

Christmas Tiered Tray Decor Ideas That Make a Small Space Shine
A Christmas tiered tray is the smallest piece of Christmas decor that still feels like a whole display. It stands on one corner of a kitchen counter, one end of a sideboard, or one shelf of a coffee station, and it holds the entire season in a space no bigger than a dinner plate. A mini tree, a tiny house, a mug, a few ornaments, a sprig of greenery, and suddenly a plain counter looks like Christmas lives there. That is the honest appeal of a tiered tray. It gives you the layered, styled look of a full mantel or a full table, without needing a mantel or a table at all.
I bought my first tiered tray by accident. It was a plain wooden two-tier stand in a clearance bin, bought for serving snacks, and it sat in a cupboard for a year. The first December I owned it, I put it on the kitchen counter with three small things I already had, a bottle brush tree, a red ornament, and a little house from the tree box, and the kitchen changed. Guests asked where I had bought the display. The answer was that I had not bought a display at all. I had stacked three things I already owned on a tray I already owned, and the height of the tiers did the rest. A tiered tray does not need new purchases. It needs a little height, a little colour, and a little restraint.
The tray works because it builds upward instead of outward. A flat tray spreads decor across a surface and eats counter space. A tiered tray stacks it, so the same number of pieces takes up half the footprint and looks twice as intentional. That is why it suits small kitchens, narrow entryways, apartment counters, and coffee stations better than almost any other Christmas decoration. It is also why it photographs so well. Three levels, three heights, one colour repeated, and the camera sees a finished vignette instead of a cluttered counter.
This guide covers the styling formula that works on every tray, the four themes that suit it best, hot cocoa and coffee bar trays, gingerbread trays, farmhouse trays, and neutral trays, plus where to put a tray when space is tight, what never to put on one, and how the same tray carries you from Christmas into the New Year with one small swap. Whether your tray is wood, metal, or white ceramic, two tiers or three, there is a version here that fits it. For the rest of the kitchen, our Christmas kitchen guide covers the counters, cabinets, and island around your tray, and our Christmas centerpiece guide uses the same low and layered rule on a bigger surface.
1. The 60-Second Styling Formula
Every good tiered tray follows the same build, whatever the theme, and once you know it, you can style a tray in a minute and restyle it in less. The formula has four parts. Anchor each tier with one taller piece at the back. Use three heights across the whole tray. Repeat one colour on every tier. Leave empty space on every level. That is the whole secret, and it is the reason a tray with six pieces looks better than a tray with sixteen.
Start with the anchor. Each tier needs one tall piece at the back, something that gives the eye a place to land. On the top tier, that is usually a mini tree, a small house, or a tall sign. On the bottom tier, it is a mug, a jar, or a slightly bigger house. The anchor sets the height of its tier, and everything else on that tier sits lower than it. If two pieces on one tier are the same height, they compete, and the tier looks flat. One tall piece, then smaller pieces stepping down toward the front, and the tier has a shape.
Next, think in three heights across the whole tray. A tall piece, a medium piece, and a low piece, repeated in different forms on each tier. A bottle brush tree is tall. A mug is medium. A scattering of small ornaments or a bead garland is low. A mini house is tall on the top tier and medium on the bottom tier, because the tiers themselves add height. The point is variety. A tray where everything is the same height looks like a shelf in a shop. A tray with tall, medium, and low pieces looks like a little scene.
Then repeat one colour on every tier. Pick the colour from your theme. Red on a farmhouse tray. White on a neutral tray. Gold on an elegant tray. Whatever you choose, it must appear on the top tier and the bottom tier, or the tray splits into two unrelated displays. A red ornament on top and a red mug below tie the tray together. A green sprig on top and a green tree below do the same job. One repeated colour is enough. Two repeated colours is fine. Three or more, and the tray starts to look busy, so stop at two.
Finally, leave empty space. This is the part most people skip, and it is the part that matters most. A tiered tray looks styled when you can see the tray itself between the pieces. If every inch is covered, the pieces blur into clutter and none of them reads. The rule that works is to fill about two thirds of each tier and leave one third empty. Style the tray, step back, and take one piece off each tier. The tray will look better every time. The empty air between objects is what makes the objects you kept look chosen instead of crammed.
One practical note before you start. Choose the tray first, then the pieces. A wooden two-tier tray around 30 to 40 centimetres wide suits most counters without stealing prep space. A three-tier tray suits a sideboard or a coffee station better, because it is taller and needs a spot where nobody reaches across it. A galvanised metal tray suits a farmhouse theme. A white ceramic tray suits a neutral theme. A wooden tray suits almost everything, which is why it is the one to buy first if you are buying one. Measure the spot where the tray will live before you buy, and remember that the tray plus its tallest piece needs clearance under any shelf above it.
2. Hot Cocoa and Coffee Bar Trays
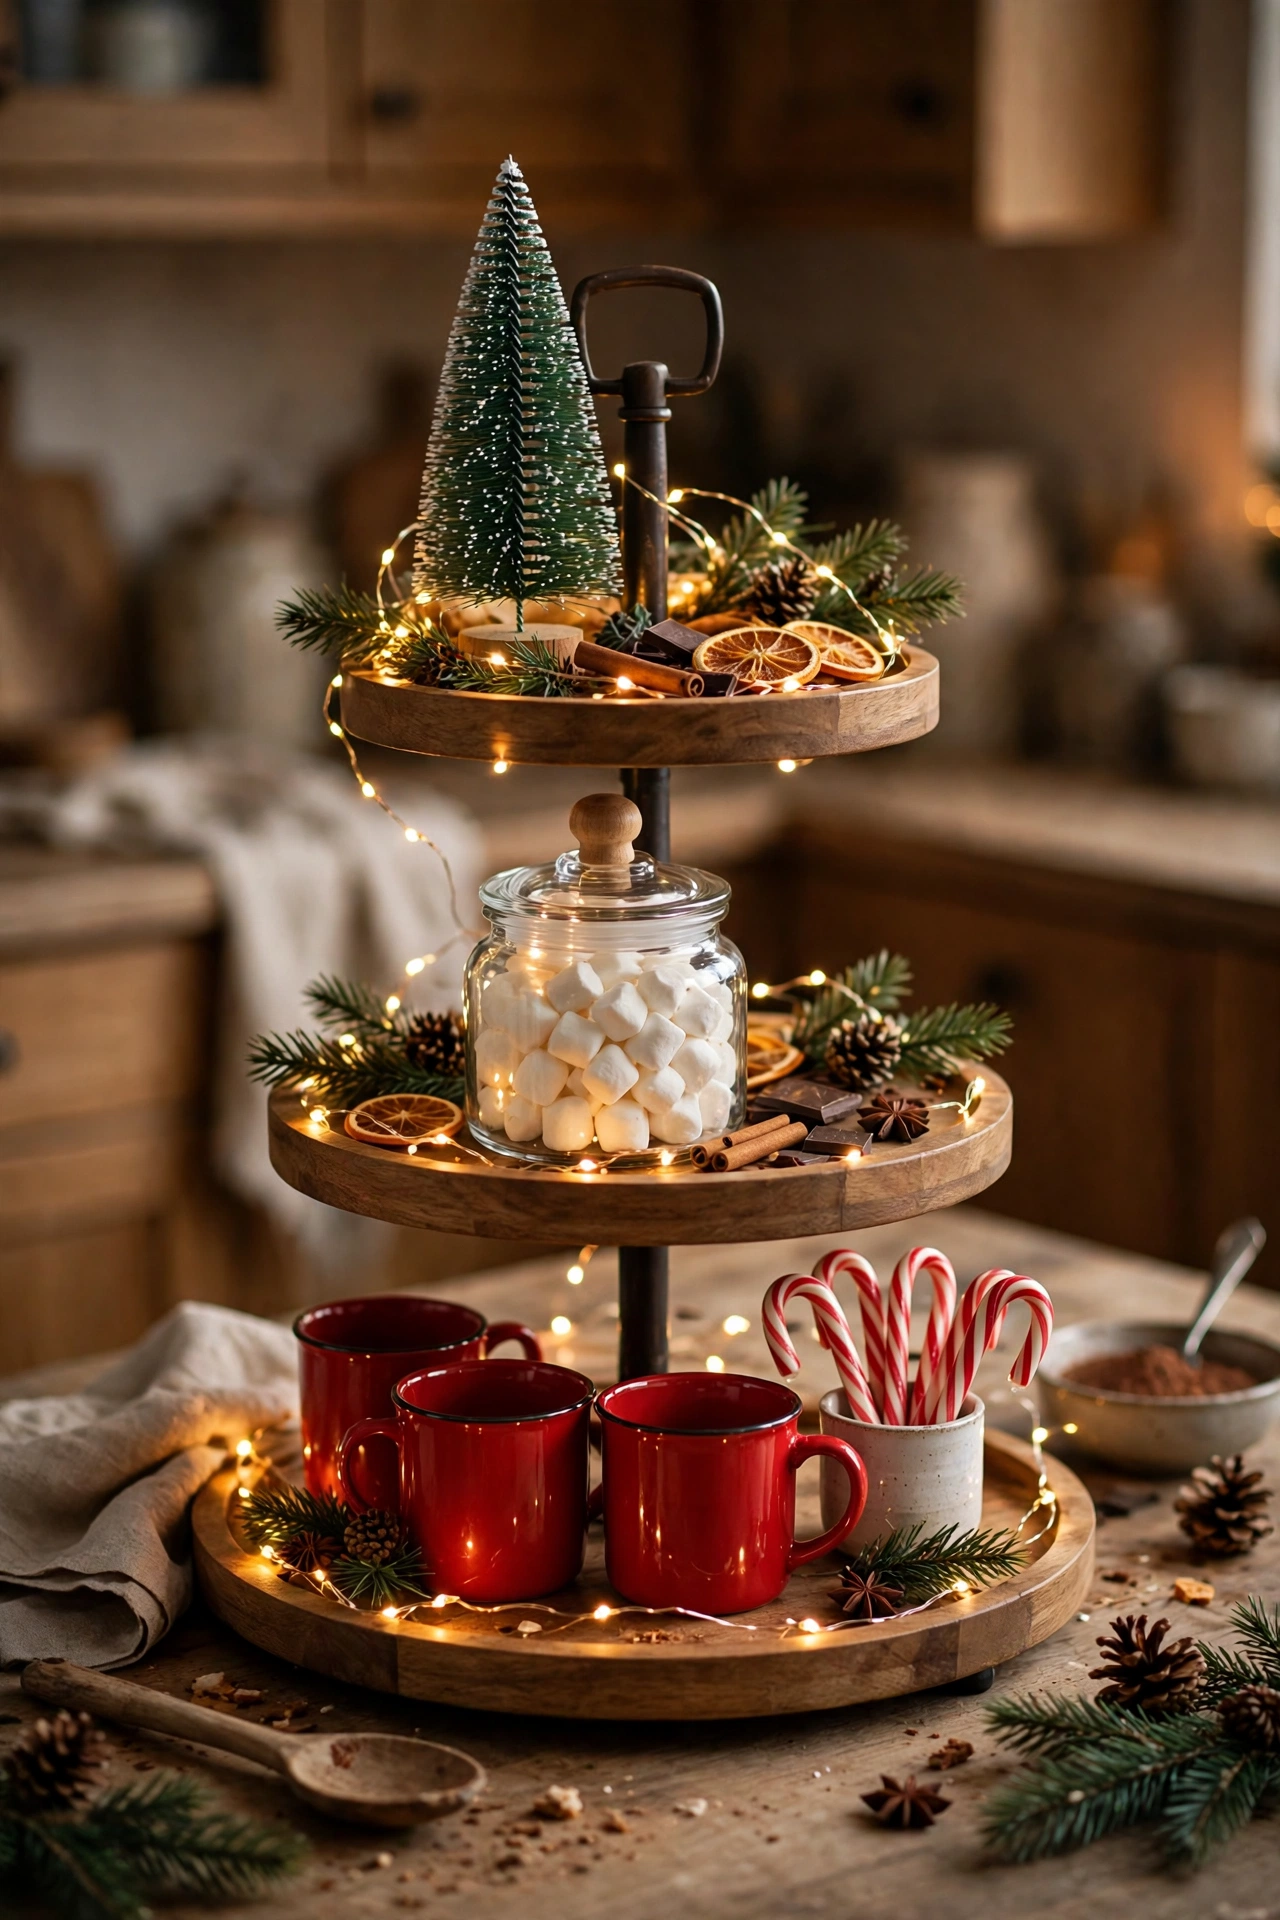
The most loved tiered tray theme of the season is the hot cocoa tray, and it earns that love because the tray becomes useful, not just pretty. A cocoa tray holds the things you actually reach for on a cold evening, and it looks like Christmas while it does it. This is also the golden idea in this guide, because a Christmas tiered tray coffee bar is the version people search for when they want a tray that works every morning, not just on Christmas Day.
Start with the bottom tier, because that is where the useful things live. A mug or two, a small jar of cocoa powder, a jar of marshmallows, and a cup holding candy canes for stirring. These are the working pieces, and they should be real and reachable. A tray that holds real cocoa gets used, and a tray that gets used stays out all December instead of being moved aside after a week. Put the mugs at the front of the bottom tier so they can be lifted off without moving anything else.
The top tier carries the decoration. A bottle brush tree, a small sign that says cocoa or hot chocolate, a few mini ornaments, and a sprig of greenery tucked into the gaps. The top tier is the pretty tier, and it is the one people see first, so keep it lighter than the bottom tier. One tall piece at the back, two small pieces in front, and a little empty space, and the top tier is done.
The colour rule matters more on a cocoa tray than on any other theme, because the tray holds food and drink. Pick one main colour and let the cocoa itself supply the brown. Red mugs with a red sign and a red ornament, on a wooden tray, is the classic version. White mugs with white houses and silver ornaments is the calm version. A plaid napkin folded under the bottom tier adds pattern without adding clutter, and it catches cocoa drips, which is a practical bonus nobody mentions until the first spill.
A coffee bar tray follows the same build with different contents. Swap the cocoa jar for a jar of coffee beans, the marshmallows for sugar cubes, and the candy canes for cinnamon sticks. Add a small French press or a pour over cone if it fits, but only if it fits without crowding the tier. A coffee tray lives on the counter where the coffee is made, so keep the working pieces at arm height and the decoration on the top tier, where it never gets in the way of the morning routine.
Two warnings for cocoa and coffee trays. First, keep anything edible in a closed jar. An open bowl of marshmallows on a kitchen counter collects dust, and a tray that sits for two months needs lids. Second, never put a real candle on a tray that holds food or paper. A battery candle in a small glass holder gives the same glow with none of the risk, and it can sit on the top tier where the flame would be a hazard. Our Christmas coffee table guide uses the same battery candle rule, and it is the rule to follow here too.
A cocoa tray costs almost nothing if you already own the pieces. One tray, two mugs, one jar, a handful of candy canes, and a tree you already own. That is the whole shopping list. Buy the tray if you do not own one, and shop your own cupboards for everything else. The tray is the only piece that has to be new.
3. Gingerbread and Sweet Treat Trays
Gingerbread is where a tiered tray gets its cosiest, most nostalgic look, and it is the theme that children notice first. A gingerbread tray is a tray of warm browns, cream, red, and white, and it works because the colours are the colours of baking. It smells like December even when nothing on it is edible, and it suits a kitchen counter better than any other room, because the kitchen is where the baking happens.
The anchor for a gingerbread tray is a small gingerbread house. It can be a real baked house, a ceramic house, or a wooden house painted to look like gingerbread. Put it on the top tier at the back, because it is the tallest and most detailed piece, and it deserves the highest spot. Below it, on the middle or bottom tier, lean gingerbread cookie cutouts against the back rail, or stand a small gingerbread man figure where it can be seen from the front. The house is the star, and the smaller pieces are its supporting cast.
Build the rest of the tray from baking shapes. A jar of cinnamon sticks. A small bowl of star anise. A rolling pin, the smallest one you own, laid across the bottom tier. A mug with a gingerbread man on it. Cookie cutters hung from the side of the tray by a ribbon, which adds height without taking space on a tier. The rule is that every piece should look like it belongs in a kitchen at Christmas, and if a piece does not pass that test, it belongs on a different tray.
The colour palette for gingerbread is simple. Brown from the tray and the gingerbread itself, cream from the icing colours and the mugs, red from the ornaments and the ribbon, and a touch of green from a sprig of pine tucked behind the house. That is four colours, and it works because brown and cream are neutrals that let the red and green read as accents. If the tray starts to look too brown, add a white piece, a white mug or a white house, to lift it. If it looks too red, take one red piece away. The tray should look like a bakery window, not a sweet shop.
A gingerbread tray also works as a dessert tray on Christmas Day, with one change. Swap the decorative pieces for the real thing. A plate of gingerbread men on the bottom tier, a small bowl of icing sugar for dusting on the middle tier, and the house on top. It is a serving tray and a decoration at the same time, and guests help themselves from the tray instead of from a plate on the table. Keep the tray away from the oven and away from steam, because a real gingerbread house softens in humidity, and a tray that sits next to a kettle will not survive the day.
If you bake, make the tray part of the baking day. Style it while the gingerbread cools, and let the children place the small pieces. A tray that children helped to style is a tray they will look after, and it is the tray they will remember. If you do not bake, buy a ceramic gingerbread house and a packet of gingerbread men from the supermarket, and the tray looks the same. Nobody can tell the difference from across the kitchen, and the tray is about the look, not the baking.
4. Farmhouse Trays
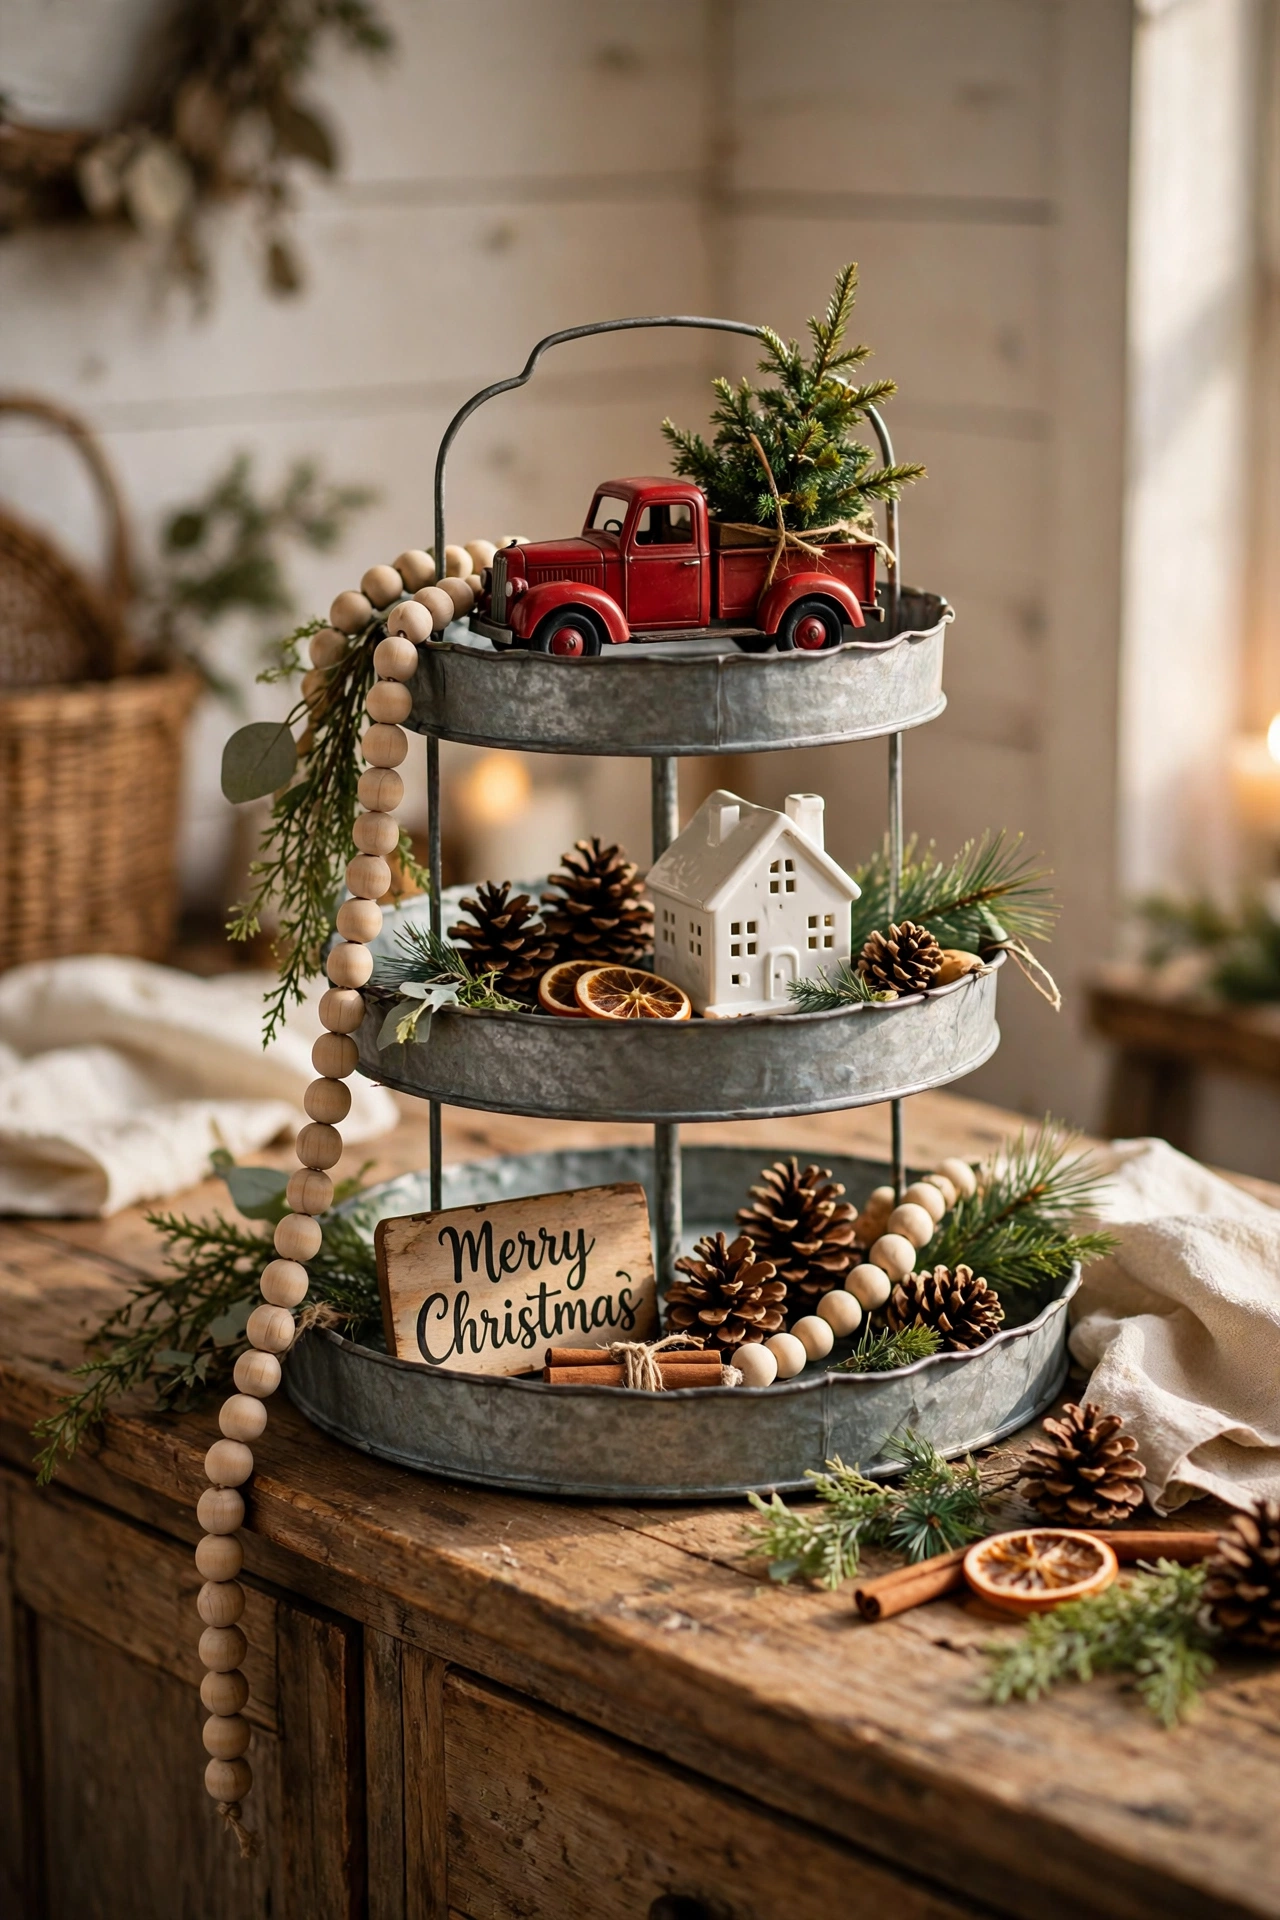
The farmhouse tray is the most popular tiered tray style on Pinterest and in shops, and it is the easiest to build, because the pieces are the same ones farmhouse decor already uses. Galvanised metal, wood, buffalo plaid, a red truck, wooden beads, and a sign that says Merry Christmas. If your home already leans farmhouse, you probably own half the pieces already, and the tray is simply a new place to put them.
The classic farmhouse tray starts with a galvanised metal tray, the grey metal with the slightly rough finish, or a wooden tray with a distressed white paint. The tray itself sets the style, so choose it to match the room. A galvanised tray suits a kitchen with white cabinets and a butcher block counter. A wooden tray suits a dining room with a farmhouse table. Either tray works, but the tray and the room should agree, because a shiny modern tray in a farmhouse room looks wrong, and a distressed tray in a modern room looks out of place.
The anchor piece for a farmhouse tray is the small red truck carrying a tree in the back. It is the single most recognisable farmhouse Christmas piece, and it belongs on the top tier at the back, where its height and its red colour pull the eye. Below it, a wooden bead garland draped across the front rail of a tier, a small Merry Christmas sign, a white mini house, and a few red ornaments. The beads are the piece that ties the tray together, because they drape across the edge and soften the hard line of the tier.
Buffalo plaid is the farmhouse pattern, and it works on a tray in small doses. A plaid napkin under the bottom tier. A plaid ribbon tied around a mug. A plaid bow on the truck. One plaid piece per tier is enough. Two plaid pieces on one tier fight each other, and the tray looks like a picnic blanket instead of a display. Keep the plaid small and let the wood, metal, and greenery do most of the work.
Greenery on a farmhouse tray should look gathered, not arranged. A sprig of faux pine tucked behind the truck. A few eucalyptus leaves laid flat on the bottom tier. A pinecone on each tier, the largest on the bottom. Farmhouse style is relaxed, and the greenery should look relaxed too, a little loose, a little uneven, like it came in from the garden rather than from a shop. If the greenery looks too perfect, it fights the distressed wood and the galvanised metal, and the tray loses its farmhouse feeling.
The farmhouse tray suits a kitchen island, a sideboard, or an entryway table, and it is the tray that survives best in a busy house, because the pieces are sturdy. A metal truck, a wooden sign, and a bead garland do not break when a bag brushes past them. That is a practical reason to choose farmhouse if your tray will live somewhere people walk past all day. A tray of glass ornaments in a hallway is a tray that will lose an ornament. A farmhouse tray in a hallway is a tray that will still be whole in January.
5. Neutral and Elegant Trays
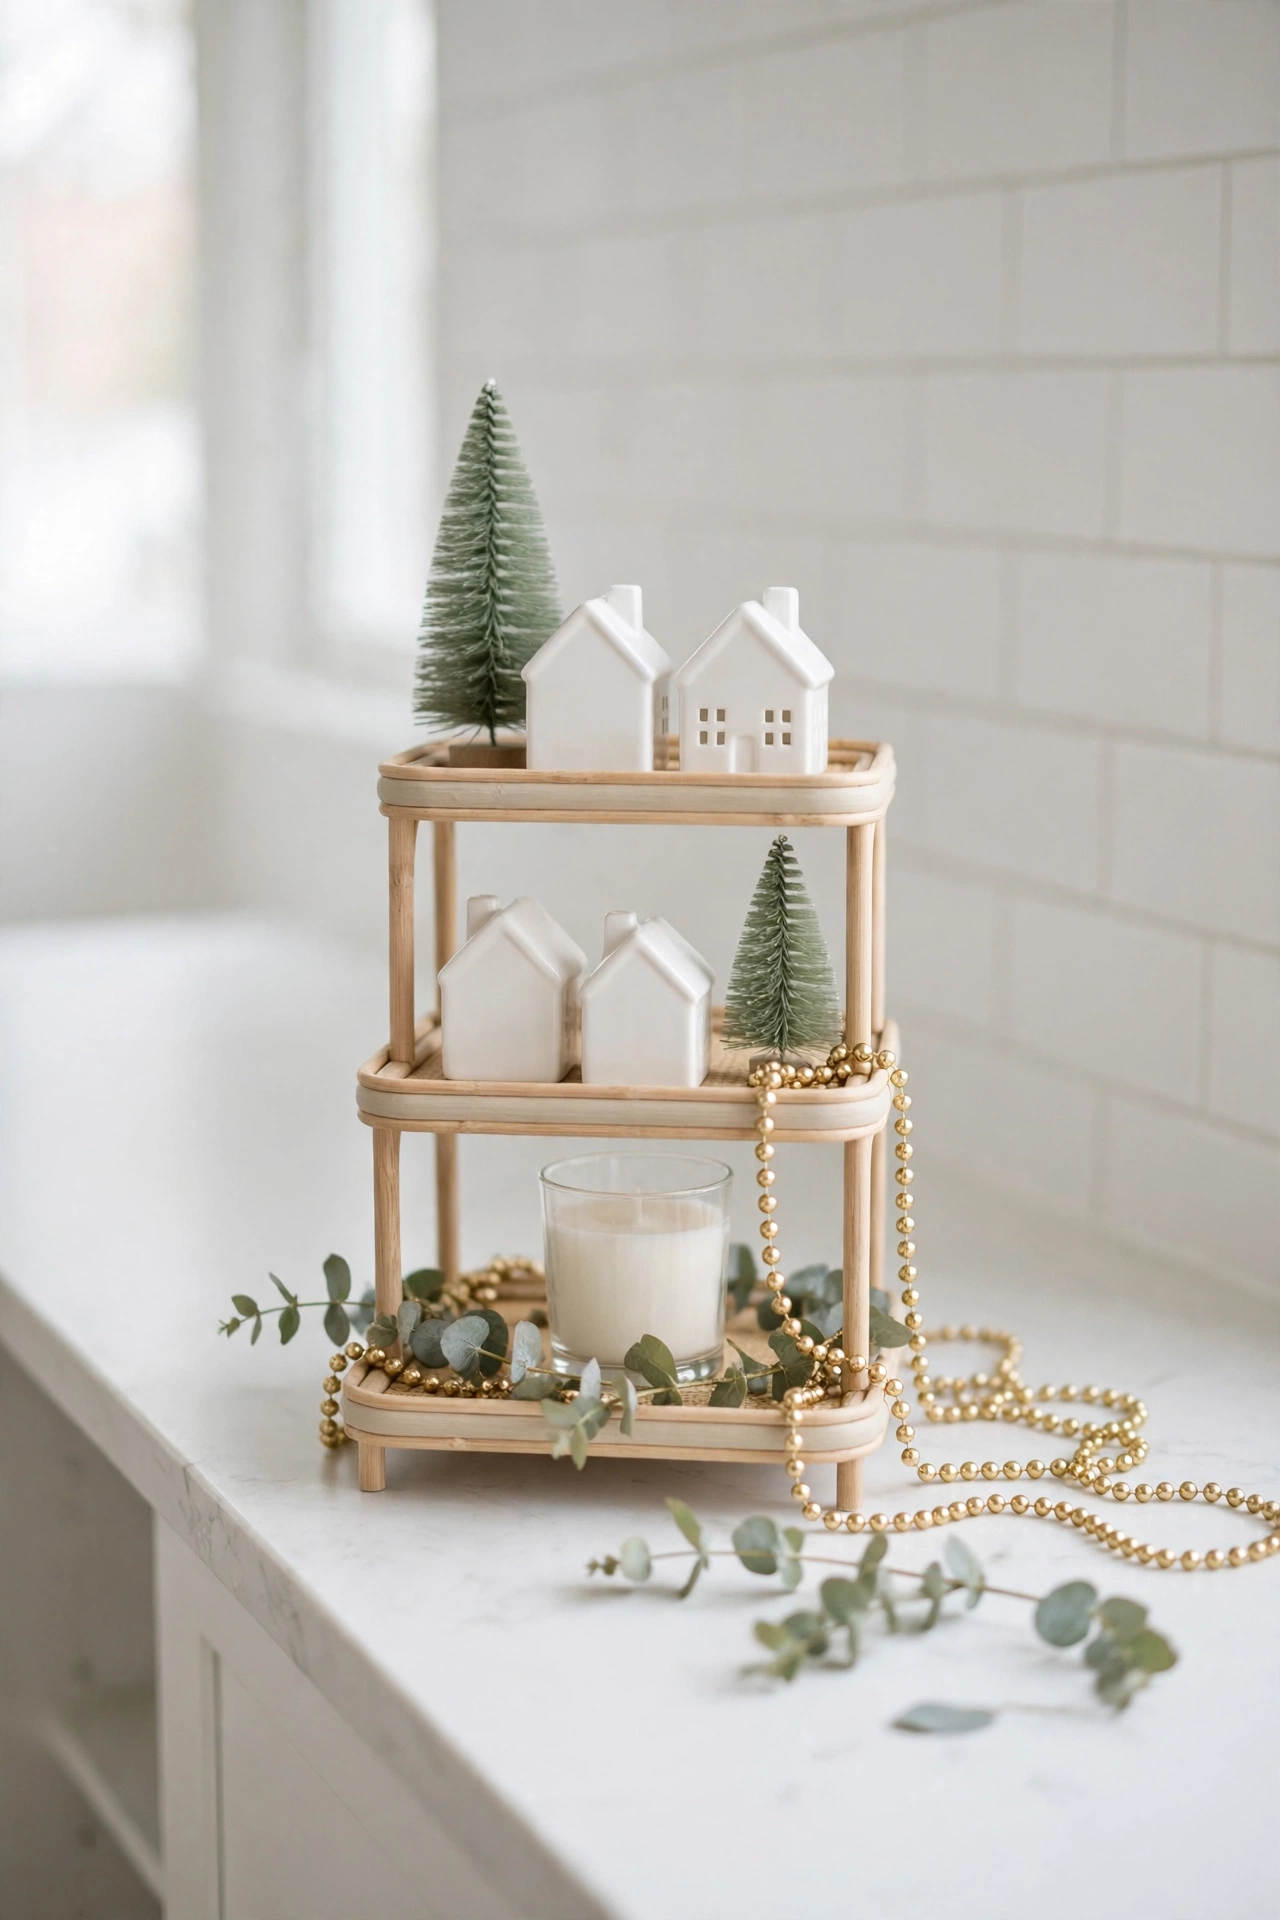
Not every Christmas tray needs red and green. A neutral tray, whites, creams, sage green, soft gold, and natural wood, suits a calm room, a modern home, or a house where the Christmas tree is white and the decorations are silver. It is the tray that looks expensive without costing more, because restraint reads as elegance, and a neutral tray is restraint made visible.
The palette is the whole idea. White mini houses. Cream ornaments. Sage green bottle brush trees. A gold bead garland. A white candle in a glass holder. Natural wood from the tray itself. That is five colours, but three of them are neutrals, so the tray reads as two colours, white and green, with gold as the accent. The rule for a neutral tray is stricter than for other themes. If a piece is bright red, bright blue, or glittery, it does not belong. One wrong colour breaks the whole tray, because the eye has nothing else to look at.
The anchor for a neutral tray is usually a white house or a white tree. A white ceramic house with warm light inside it, on the top tier, is the most elegant single piece you can put on a tray, and it earns its place because it glows. Below it, white ornaments in different finishes, matte, glossy, and frosted, give texture without adding colour. A frosted pinecone, a white bead garland, and a sprig of eucalyptus complete the tray. The texture does the work that colour does on other trays, so vary the textures deliberately. Smooth ceramic, rough wood, soft faux snow, shiny gold, and matte white, all on one tray, and the tray feels rich even though the palette is quiet.
Metallics are the accent on a neutral tray, and gold is the metal to choose. A gold bead garland draped across a tier. A gold star on top of the white tree. Gold ornaments mixed with white ones on the bottom tier. Silver works too, but it reads colder, and it suits a tray that leans winter rather than Christmas. Gold reads warmer, and it suits a tray that will sit next to warm lamplight. Pick one metal and use it on both tiers. Gold and silver together on a small tray look indecisive, and the tray is too small for indecision.
A neutral tray needs the most empty space of any theme, because the pieces are pale and the tray is pale, and a crowded neutral tray looks like a pile of white things rather than a display. Fill half of each tier, not two thirds. Let the tray show. Let the wall behind the tray show through the tiers. The empty space is part of the design, not a gap waiting to be filled, and it is what makes a neutral tray look calm instead of cluttered.
This is also the tray that suits a coffee table best, because it is low, pale, and quiet, and it does not compete with the room. Our Christmas coffee table guide covers trays on a low table, and the neutral tiered tray is the version to use there. Keep it on a side table or a coffee table where it can be seen from the sofa, and keep the battery candle lit in the evening, because a neutral tray in candlelight is the whole point of the theme.
6. Small Spaces: Counter, Entryway and Coffee Station
A tiered tray earns its place by fitting where nothing else fits, and the three spots where it works hardest are the kitchen counter, the entryway, and the coffee station. Each spot has its own rules, and a tray styled for one spot will not always work in another, so style the tray for its spot, not for a photo.
On a kitchen counter, the tray must stay out of the prep space. Put it in a corner, on the end of the island, or on a stretch of counter that nobody uses for chopping. The tray should never sit in the middle of the worktop, because it will be shoved aside every time someone cooks, and a tray that gets shoved aside gets broken. A two-tier tray suits a kitchen counter better than a three-tier tray, because it is shorter, and it fits under wall cabinets without the top piece touching the shelf. Measure the clearance before you style it, because a tree that touches the cabinet above looks like a mistake, and it will shed glitter onto the counter every time the cabinet opens.
On a kitchen counter, keep the tray useful. A cocoa tray, a coffee bar tray, or a tray that holds the salt, pepper, and oil in Christmas dress, all earn their counter space, because they do a job as well as looking pretty. A purely decorative tray on a working counter is a tray that will be moved, and a tray that is moved every day is a tray that will not survive December. If the counter is small, a one-theme tray with five pieces is better than a three-theme tray with twelve. Small counter, small tray, few pieces, and the counter still works.
In an entryway, the tray lives on a console or a side table, and its job is to greet people. The entryway tray can be taller and more decorative than a kitchen tray, because nobody cooks in an entryway, and the tray will not be moved. A three-tier tray suits an entryway console, because the console is deep enough for it, and the height of three tiers fills the wall above the console. Style the entryway tray with the theme of the house, not a theme of its own, so the tray feels like part of the welcome rather than a separate decoration. If the house is farmhouse, the entryway tray is farmhouse. If the house is neutral, the entryway tray is neutral.
At a coffee station, the tray is part of the station, not a decoration on it. Put the working pieces on the bottom tier, mugs, spoons, sugar, and put the decoration on the top tier, a tree, a sign, and a few ornaments. The coffee station tray should be the smallest tray that holds the working pieces, because a coffee station is already crowded, and a tray that is too big will push the coffee machine to the edge. A two-tier wooden tray, 30 centimetres wide, is the right size for most coffee stations. Anything bigger is a sideboard tray, not a coffee station tray.
One rule covers all three spots. The tray must be stable. A tiered tray is top heavy, and a tray on a narrow console or a crowded counter can be knocked over by a bag, a coat, or a child reaching for a mug. Put a small piece of non-slip mat under the tray, keep the heaviest pieces on the bottom tier, and keep the tray away from the edge of the surface. A tray that falls breaks ornaments, spills cocoa, and ruins a morning. A tray that stands still is a tray that lasts all December.
7. What NOT to Put on a Tiered Tray
A tiered tray has limits, and knowing them saves more trays than any styling tip. The first limit is weight. A tiered tray is held together by a central rod, and it is not built to hold heavy things. A large ceramic house, a full jar of cocoa, a heavy candle holder, or a stack of books will bend the rod, tilt the tiers, and eventually break the tray. Put the heaviest piece on the bottom tier, and keep the top tier light. If a piece feels heavy in your hand, it belongs on the bottom tier or not on the tray at all.
The second limit is height. A piece that is taller than the gap between two tiers will not fit, and forcing it will scratch the tier above or snap the piece. Measure the gap between your tiers before you buy pieces for the tray. Most two-tier trays have a gap of 20 to 25 centimetres, which fits a mini tree, a mug, and a small house, but not a tall candle holder or a large sign. A three-tier tray has smaller gaps, so the pieces must be smaller still. Buy pieces for the tray you own, not for the tray in the photo.
The third limit is food safety. A tray that holds food must hold it in closed jars or on a plate that can be washed. Loose sweets, open bowls of nuts, and unwrapped biscuits on a tray collect dust, and a tray that sits out for two months is not a clean place for open food. Keep food in jars with lids, and keep the tray away from the stove, where steam and grease settle on everything. A tray near a stove is a tray that will need washing every week, and a tray that needs washing every week is a tray that will be put away.
The fourth limit is real flame. Never put a real candle on a tiered tray. The tiers are close together, the pieces are small and often made of wood, paper, or dried greenery, and a flame in the middle of that is a fire risk. Battery candles give the same glow, they can be put on a timer, and they cannot set a paper house alight. This is the one rule on this list with no exceptions. If a tray needs light, use a battery candle or a short string of battery fairy lights, and keep the battery pack hidden behind the anchor piece.
The fifth limit is water. Never put a real plant, a vase of fresh flowers, or a wet piece on a tiered tray. Water drips onto the tier below, stains the wood, rusts the metal, and soaks the paper pieces. If the tray needs greenery, use faux greenery. If it needs a plant, use a tiny faux succulent in a pot with no drainage hole. A tiered tray is a dry display, and it stays beautiful because it stays dry.
Finally, do not put anything on a tray that you would be upset to lose. A tray in a hallway, a kitchen, or a coffee station gets knocked, brushed, and reached across all day. An heirloom ornament, a handmade piece from a child, or a valuable antique does not belong on a tray. Put the sturdy pieces on the tray, and keep the precious pieces on the tree or in a cabinet, where they are safe. A tray is for the everyday pieces, and that is what makes it fun to style without worry.
8. From Christmas to New Year in One Swap
A tiered tray that only works for Christmas is a tray that gets packed away on Boxing Day, and that is a waste of a good tray. The same tray, with one small swap, carries you into the New Year, and the swap takes five minutes. The trick is to style the tray with the swap in mind from the start, so that the Christmas pieces are the ones that lift off easily, and the pieces underneath are the ones that stay.
Start by building the tray on a neutral base. A wooden tray, white houses, white ornaments, gold beads, and greenery will work for Christmas and for New Year with no change at all, because none of those pieces say Christmas specifically. The Christmas pieces are the ones you add on top, a Merry Christmas sign, a red ornament, a Santa figure, and those are the pieces you remove on the 27th of December. If the tray is built on a red base, with red pieces on every tier, the swap is harder, because the whole tray has to change. Build neutral, add Christmas, remove Christmas, and the tray is a New Year tray.
The swap itself is simple. Take off the Merry Christmas sign and replace it with a small clock, a gold star, or a sign that says Happy New Year. Take off the red ornaments and replace them with gold ones, or leave the white ornaments where they are and add a few gold pieces. Take off the Santa figure and replace it with a small bottle brush tree in white or gold, which reads as winter rather than Christmas. Leave the houses, the greenery, and the candle where they are. The tray now says winter celebration instead of Christmas, and it can stay out until the middle of January without looking out of season.
The same swap works in reverse at the start of December. If you style the tray for winter first, white houses, gold beads, greenery, and a candle, and then add the Christmas pieces on top, the tray is ready for Christmas in five minutes, and it is ready for New Year in five minutes after that. One tray, three looks, and the only pieces you buy twice are the small signs and the small ornaments. The houses, the tray, the beads, and the candle work all winter, and they are the pieces worth spending money on.
A tiered tray that stays out after Christmas also gives you a place for the small gifts and cards that arrive late. A New Year card tucked behind the clock. A small box of chocolates on the bottom tier. A sprig of fresh greenery replaced for the new year. The tray becomes the winter tray, not the Christmas tray, and it earns its place on the counter for another month. That is the real value of a tiered tray. It is not a Christmas decoration. It is a small stage, and the season is just the first play you put on it.
Conclusion
A Christmas tiered tray is the smallest stage in your home, and it is the one that gives you the most for the least. One tray, a few pieces you already own, a little height, a little colour, and a little empty space, and a plain counter looks like Christmas lives there. The formula never changes. Anchor each tier with one tall piece at the back. Use three heights. Repeat one colour. Leave empty space. Every theme in this guide, cocoa, gingerbread, farmhouse, and neutral, follows that formula, and every theme works because the formula works.
Start with the tray you already own, or buy one wooden two-tier tray and use it for years. Style it for the spot where it will live, not for a photo, and keep it useful if it lives in the kitchen. Keep it light on the top tier, keep it dry, keep real flame off it, and keep the precious pieces somewhere safe. When Christmas ends, swap the sign and the red pieces, and the tray carries you into the New Year. A tiered tray is not a decoration you buy for one December. It is a habit, a small styled moment on a counter that makes the whole room feel cared for, and once you have styled one, you will style it again next year, with different pieces, in the same ten minutes, and it will look just as good.
FAQ
How do you style a Christmas tiered tray?
Pick one theme, then follow the formula. Anchor each tier with one tall piece at the back, use three heights across the tray, repeat one colour on every tier, and leave about one third of each tier empty. Style it, step back, and take one piece off each tier. The tray will look better every time.
What size tiered tray is best for a kitchen counter?
A wooden two-tier tray around 30 to 40 centimetres wide suits most counters without stealing prep space. It fits under wall cabinets, it holds enough pieces to look styled, and it leaves room to cook. A three-tier tray suits a sideboard or a coffee station better, because it is taller and needs a spot where nobody reaches across it.
What should I put on a Christmas tiered tray?
Mini trees, small houses, mugs, jars of cocoa or marshmallows, candy canes, small ornaments, a bead garland, a small sign, and a sprig of greenery. Pick pieces from one theme, keep the heaviest pieces on the bottom tier, and keep the top tier light. Everything on the tray should be sturdy enough to survive being brushed past.
Can you put a real candle on a tiered tray?
No. Never put a real candle on a tiered tray. The tiers are close together, the pieces are small and often made of wood, paper, or dried greenery, and a flame in the middle of that is a fire risk. Use a battery candle in a small glass holder, or a short string of battery fairy lights, for the same glow with none of the risk.
How do I change a Christmas tiered tray for New Year?
Remove the Christmas pieces, the Merry Christmas sign, the red ornaments, and the Santa figure, and replace them with a small clock or a Happy New Year sign, gold ornaments, and a white or gold tree. Leave the houses, the greenery, and the candle where they are. The tray now reads as winter celebration, and it can stay out until the middle of January.