Christmas Ornament Decor Ideas for Every Room
Most ornaments stay in a box for eleven months and come out for one month on a tree, and that is a waste of the prettiest things you own. A box of ornaments is not tree decor. It is a decorating system, ready to be used in every room of the house. The same baubles that hang on the tree can fill a bowl on the coffee table, hang in a window where the light shines on them, tuck into the garland on the mantel, and run down the dining table like a runner that cost you nothing. The tree has one job. The ornaments can do a dozen.
The reason most people never use ornaments beyond the tree is not that they have no ideas. It is because they have no system. Without a plan, ornaments spread around the house look random, like decorations that fell off the tree and ended up somewhere by chance. With a plan, the same ornaments look intentional, because the same colours and the same finishes repeat from room to room, and the eye sees the whole house as one decorated home instead of ten separate groups of things. This guide gives you that plan, and it is simple enough to remember: three moves, one palette, and a count that stops you buying more than you need.
The three moves are bowl, hang, and tuck. Bowl means ornaments as fillers, in bowls, vases, trays and glass jars, where their colour and shine do the work at table height. Hang means ornaments suspended where the eye travels, in windows, doorways, stair garland and from light fixtures, where they catch light and move gently. Tuck means ornaments nestled into garland on the mantel, the staircase and the shelves, and set into the tablescape, where they fill gaps and connect the pieces around them. One ornament system, three moves, and every room in the house can use at least two of them.
You do not need new ornaments to start. Open the box you already own, sort it by colour and finish, and you will probably find you have more than enough, because most households own two or three times the ornaments their tree can hold. The extras are not spares. They are the bowl on the coffee table, the window in the kitchen, and the garland on the mantel. This guide starts with the system, then the palette, then each move in turn, then the tree itself, because the tree still matters, then the handmade ornaments worth making, and finally the small rooms, kids and pets version, because ornaments and toddlers need a plan of their own. A bowl, a roll of ribbon, and the box you already own will carry the whole look, and your house will glow from more than one corner this December.
The One Ornament System: Bowl, Hang, and Tuck
Every good ornament display in every home you admire uses the same three moves, whether the owner knows it or not. Bowl, hang, and tuck. Learn the three moves and you can decorate a whole house with one box of ornaments, and the result will look planned instead of accidental, because the same moves repeat in every room and the repetition is what the eye reads as style.
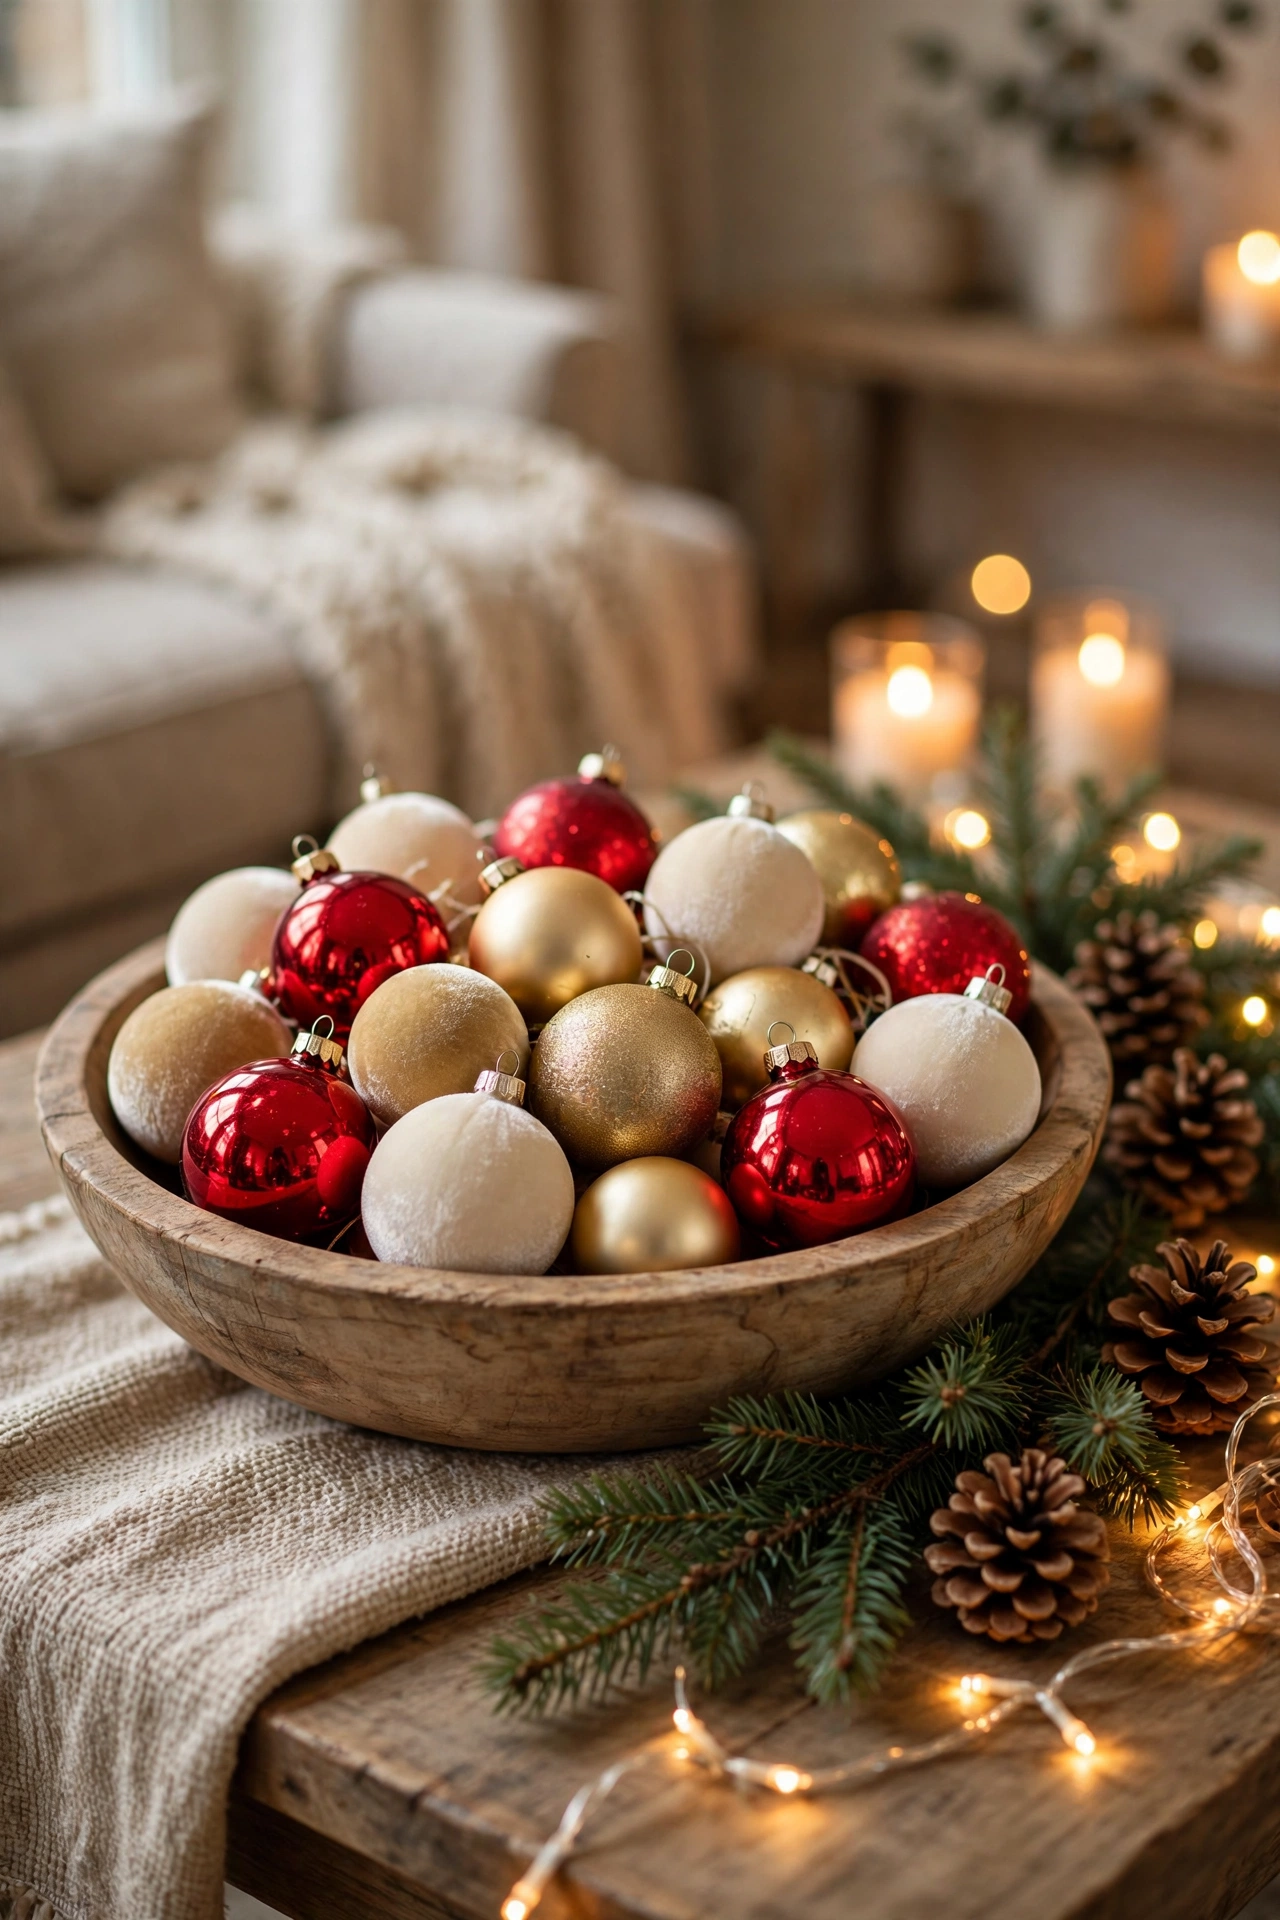
Bowl is the easiest move and the one most people underuse. Take a wide, shallow bowl, ten to twelve inches across on a coffee table, eight inches on a sideboard, and fill it two thirds full with ornaments in your palette, mixing one shiny, one matte and one textured finish, such as velvet or frosted glass. Tuck a few sprigs of greenery and two or three pinecones around the edges, and add a short string of battery fairy lights if the bowl sits somewhere dark. That is the whole project. It takes two minutes, it costs nothing if you own the bowl and the ornaments already, and it turns a bare coffee table into a centerpiece. The bowl works because ornaments are designed to catch light, and a bowl of them at table height puts that shine exactly where people sit and look. The Christmas Centerpiece Ideas guide on this site builds whole centerpieces the same way, and a bowl of ornaments is the simplest version of that idea, which is why it works in every room, from the living room to the bathroom vanity.
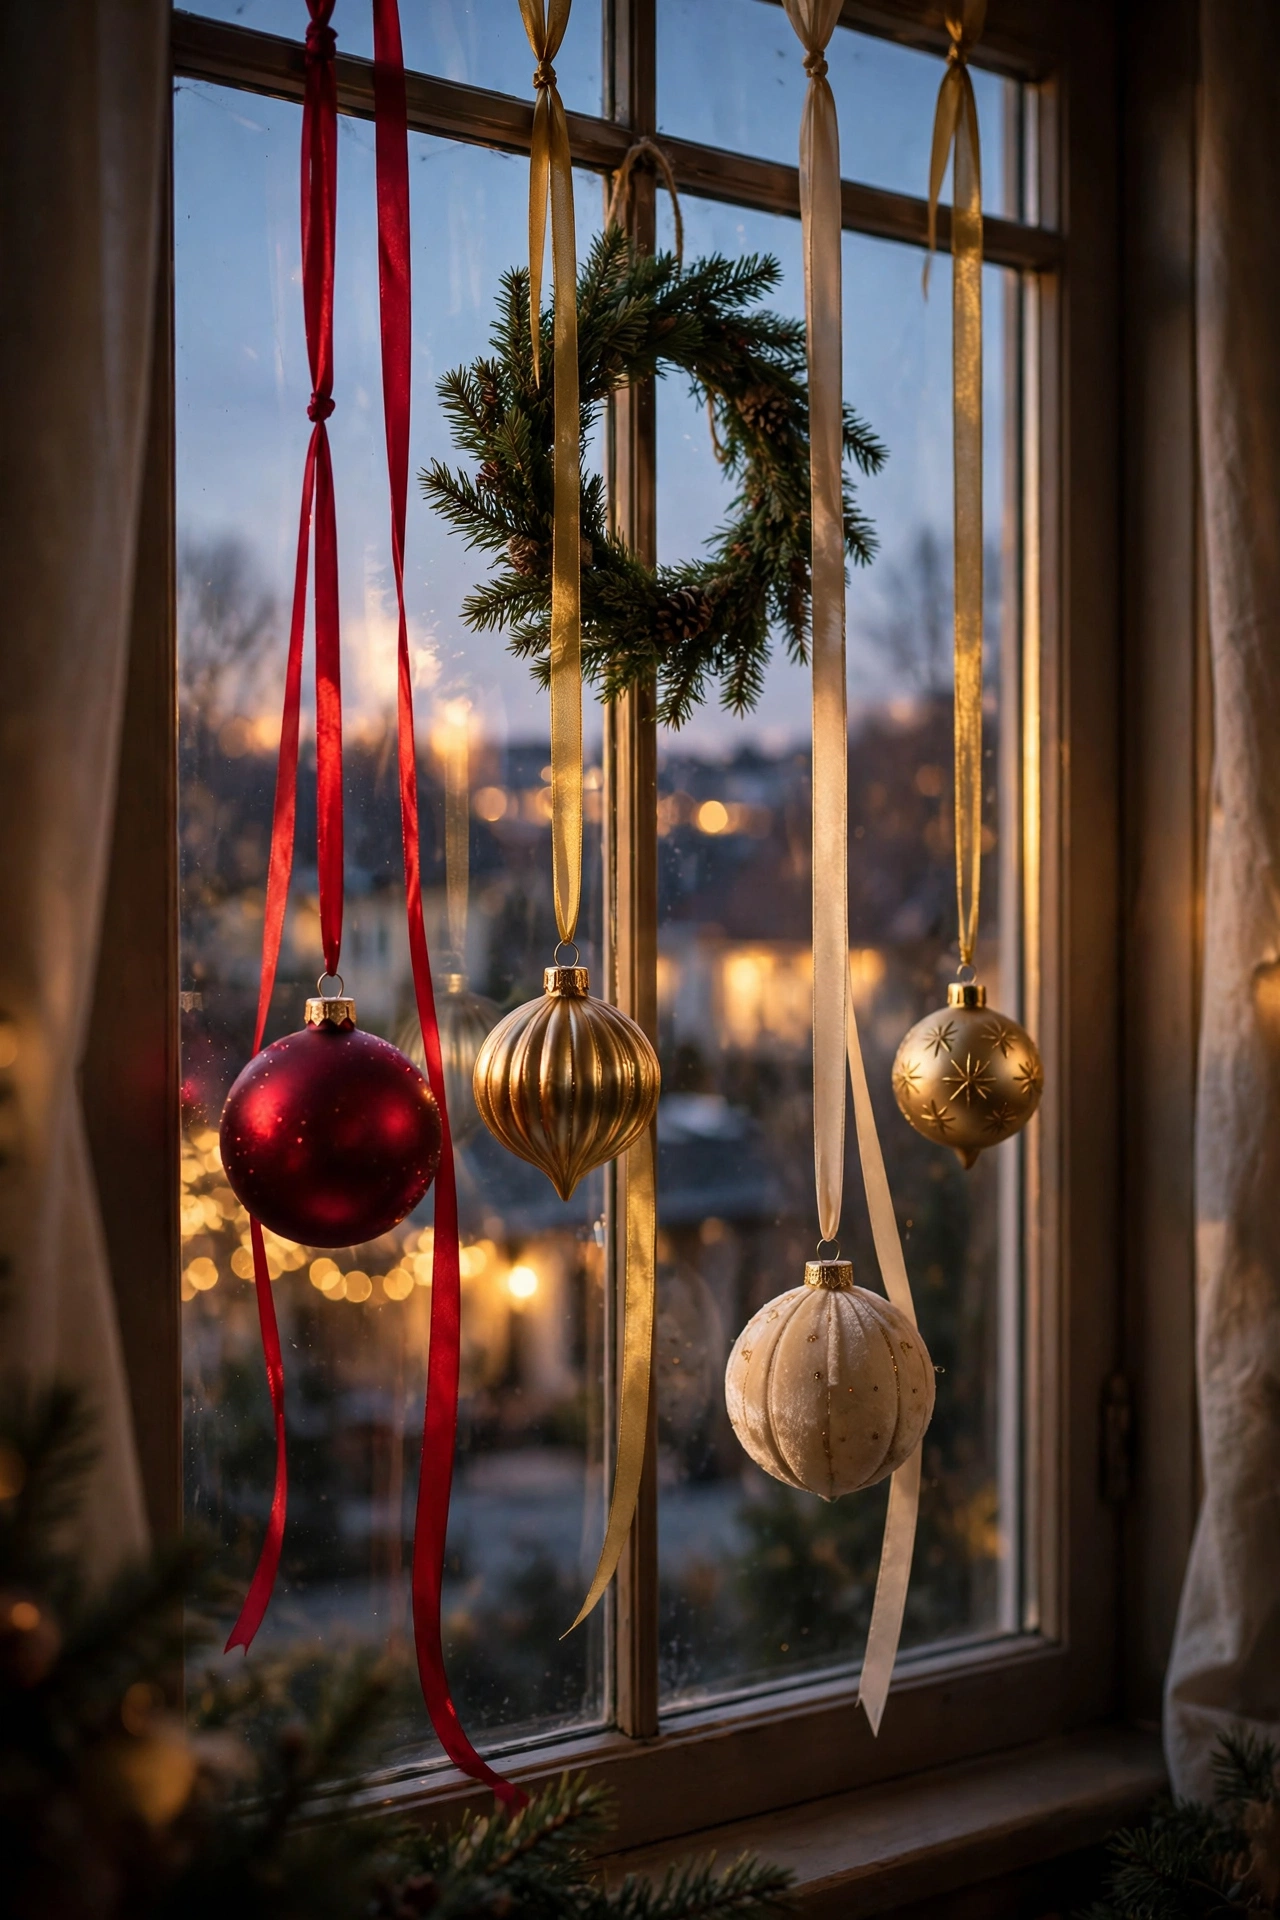
Hang is the move that gives a room its glow. Ornaments suspended where the eye travels, in windows, doorways, stair garland and from light fixtures, catch light and move gently, and a room with something moving in it feels alive in a way a room full of still objects never does. Hang ornaments on ribbon, not on string, because ribbon reads as decoration and string reads as a repair. Cut the ribbon in three lengths, short, medium and long, and hang one ornament from each, so the group has depth instead of lining up in a row. A window takes five to seven ornaments on a curtain rod or a suction hook. A doorway takes one cluster of three. A chandelier takes one ornament per arm, hung low enough to see and high enough to clear heads. The trick is to hang fewer than you think. Five ornaments in a window look elegant. Fifteen look like a craft fair exploded.
Tuck is the quietest move and the one that makes the difference between decorated and finished. Tuck ornaments into the mantel garland, one every eight to ten inches, pressed gently into the greenery so each ornament sits in a pocket of leaves rather than on top of them, and the garland suddenly looks full without a single extra branch. Tuck one small ornament per shelf vignette, beside a stack of books or in front of a framed photograph, and the shelves stop looking like storage and start looking like part of the season. Tuck ornaments into the dining table runner, nestled into loose greenery with candles, and the table has a runner that cost you nothing. The tuck works because it connects things. An ornament in a bowl is a display. An ornament tucked into garland connects the garland to the candlesticks beside it, and the whole mantel reads as one composition instead of three separate objects.
The order matters. Bowl first, because it is fast and it gives you an instant win. Hang second, because it needs the ribbon cut and the hooks placed. Tuck last, because it needs the garland and the shelves already in place. Work room by room, not move by move across the whole house, because finishing one room completely feels better than having three half finished rooms, and because you can see what the system looks like when it is done before you repeat it. And keep one rule for all three moves: repeat the same palette in every room. Two main colours and one metal, sage green and cream with brass, for example, or red and cream with gold, and let every bowl, strand and tuck repeat it. The palette is what makes one box of ornaments look like a whole house plan.
Start With a Palette, Not a Shopping Trip
The most common ornament mistake is buying more ornaments before sorting the ones you own. A box of ornaments bought in a hurry, in five different colours and four different finishes, will never look like a plan, no matter how many of them you hang. A box of ornaments sorted into a palette will look like a plan even if it is small, because the eye reads repetition as intention. So before you buy anything, open every box, lay the ornaments out on a bed or a table, and sort them.
Sort by colour first. Put all the reds together, all the golds together, all the silvers, all the greens, all the whites and creams, and all the odd ones, the novelty ornaments, the handmade ones, the ones with a story, in their own pile. Most households find they own far more of one colour than they thought, usually red or gold, and almost none of another. That is useful information. It tells you which colour is your house colour, the one you already own in depth, and which colours are just accents. Your house colour should be one of the two main colours in your palette. The second main colour should be the one you own the second most of, or a neutral like cream, white or natural wood that goes with everything.
Then sort by finish. Shiny, matte, glitter, velvet, frosted glass, mercury glass, wood, and felt. A good display mixes finishes, because a bowl of all shiny ornaments looks like a shop display and a bowl of all matte ornaments looks flat. The rule that works in almost every home is one shiny, one matte, and one textured finish in every group. A bowl with shiny red, matte cream, and velvet green ornaments has depth. A tree with shiny gold, matte gold, and mercury glass ornaments has depth. A window with only shiny ornaments has glare. Keep the finishes balanced and the colours will take care of themselves.
Then choose the palette and write it down. Two main colours and one metal is the formula that never fails. Red and cream with gold. Forest green and cream with brass. Burgundy and blush with gold. Deep blue and silver with white. Sage green and cream with brass. Pick the one that matches the ornaments you already own in depth, and let the metal be the one your light fixtures and picture frames already use, because a new metal in December fights with the metals your house already has. Once the palette is chosen, everything else gets easy. Anything that does not fit the palette goes back in the box for this year, or moves to a single themed spot, like the kids tree or one shelf, where it can be itself without breaking the rest of the house.
Now count what you have, because the count stops you buying more than you need. A standard seven and a half foot tree takes about 80 to 120 ornaments, with roughly 20 large anchor ornaments for the inner core, 50 medium pieces for the main branches, and 30 to 40 smaller accent pieces for the branch tips. That number comes from the tree decorating guides published this season, and it surprises most people, because it is more than a tree looks like it holds. Count your box. If you own 150 ornaments and your tree takes 100, you have 50 ornaments for the bowls, windows and garland, which is plenty. If you own 60 ornaments and your tree takes 100, your tree is not under decorated, your tree is telling you to buy one more box in your palette, not five more boxes in five colours. Buy the gaps, not the extras. One box of 20 ornaments in your palette, in mixed finishes, fills a tree and leaves enough for a bowl and a window. Five boxes in five colours fill a cupboard and leave you sorting again next year.
Finally, store the sorted ornaments by palette when the season ends, not by the box they came in. A labelled box per palette, with the shiny, matte and textured ornaments separated by tissue paper, means next December starts with a plan instead of a sort. The Christmas Storage Ideas guide on this site covers the label and zone system in full, and ornaments are the one decoration that benefits most from it, because a sorted box is a decorated house waiting to happen, and an unsorted box is an afternoon lost to sorting before you hang a single thing.
Bowls and Vases: Ornaments as Tabletop Fillers
The bowl is the easiest ornament display there is, and it is also the most forgiving, because a bowl hides every mistake. An ornament that looks plain on a tree looks rich in a bowl, because the bowl puts it next to other ornaments and the group does the work. Start with the container, because the container sets the scale. A wide, shallow bowl, ten to twelve inches across, suits a coffee table. An eight inch bowl suits a sideboard or a console. A tall glass vase suits a mantel end or a dining table, where height is welcome. A dough bowl, a wooden crate, or a basket suits a farmhouse or rustic room. A hurricane glass or a large glass jar suits a modern room, because the glass lets the ornaments show through from every side. Use what you own. The container does not need to be new. It needs to be the right size for the surface, and it needs to be stable enough that a cat or a child cannot tip it with one touch.
Fill the bowl two thirds full, not to the brim. A bowl filled to the brim looks like storage. A bowl filled two thirds full, with the ornaments mounded slightly in the middle, looks like a display. Mix the finishes, one shiny, one matte, one textured, and mix the sizes, with two or three large ornaments as anchors and the rest medium and small. Tuck greenery around the edges, a few sprigs of pine or cedar, two or three pinecones, and a short string of battery fairy lights if the bowl sits somewhere dark. The greenery matters more than people think, because it stops the bowl looking like a box of ornaments tipped onto a table. It gives the ornaments a setting, the way soil gives a plant a setting, and the eye reads the whole thing as a centerpiece instead of a pile.
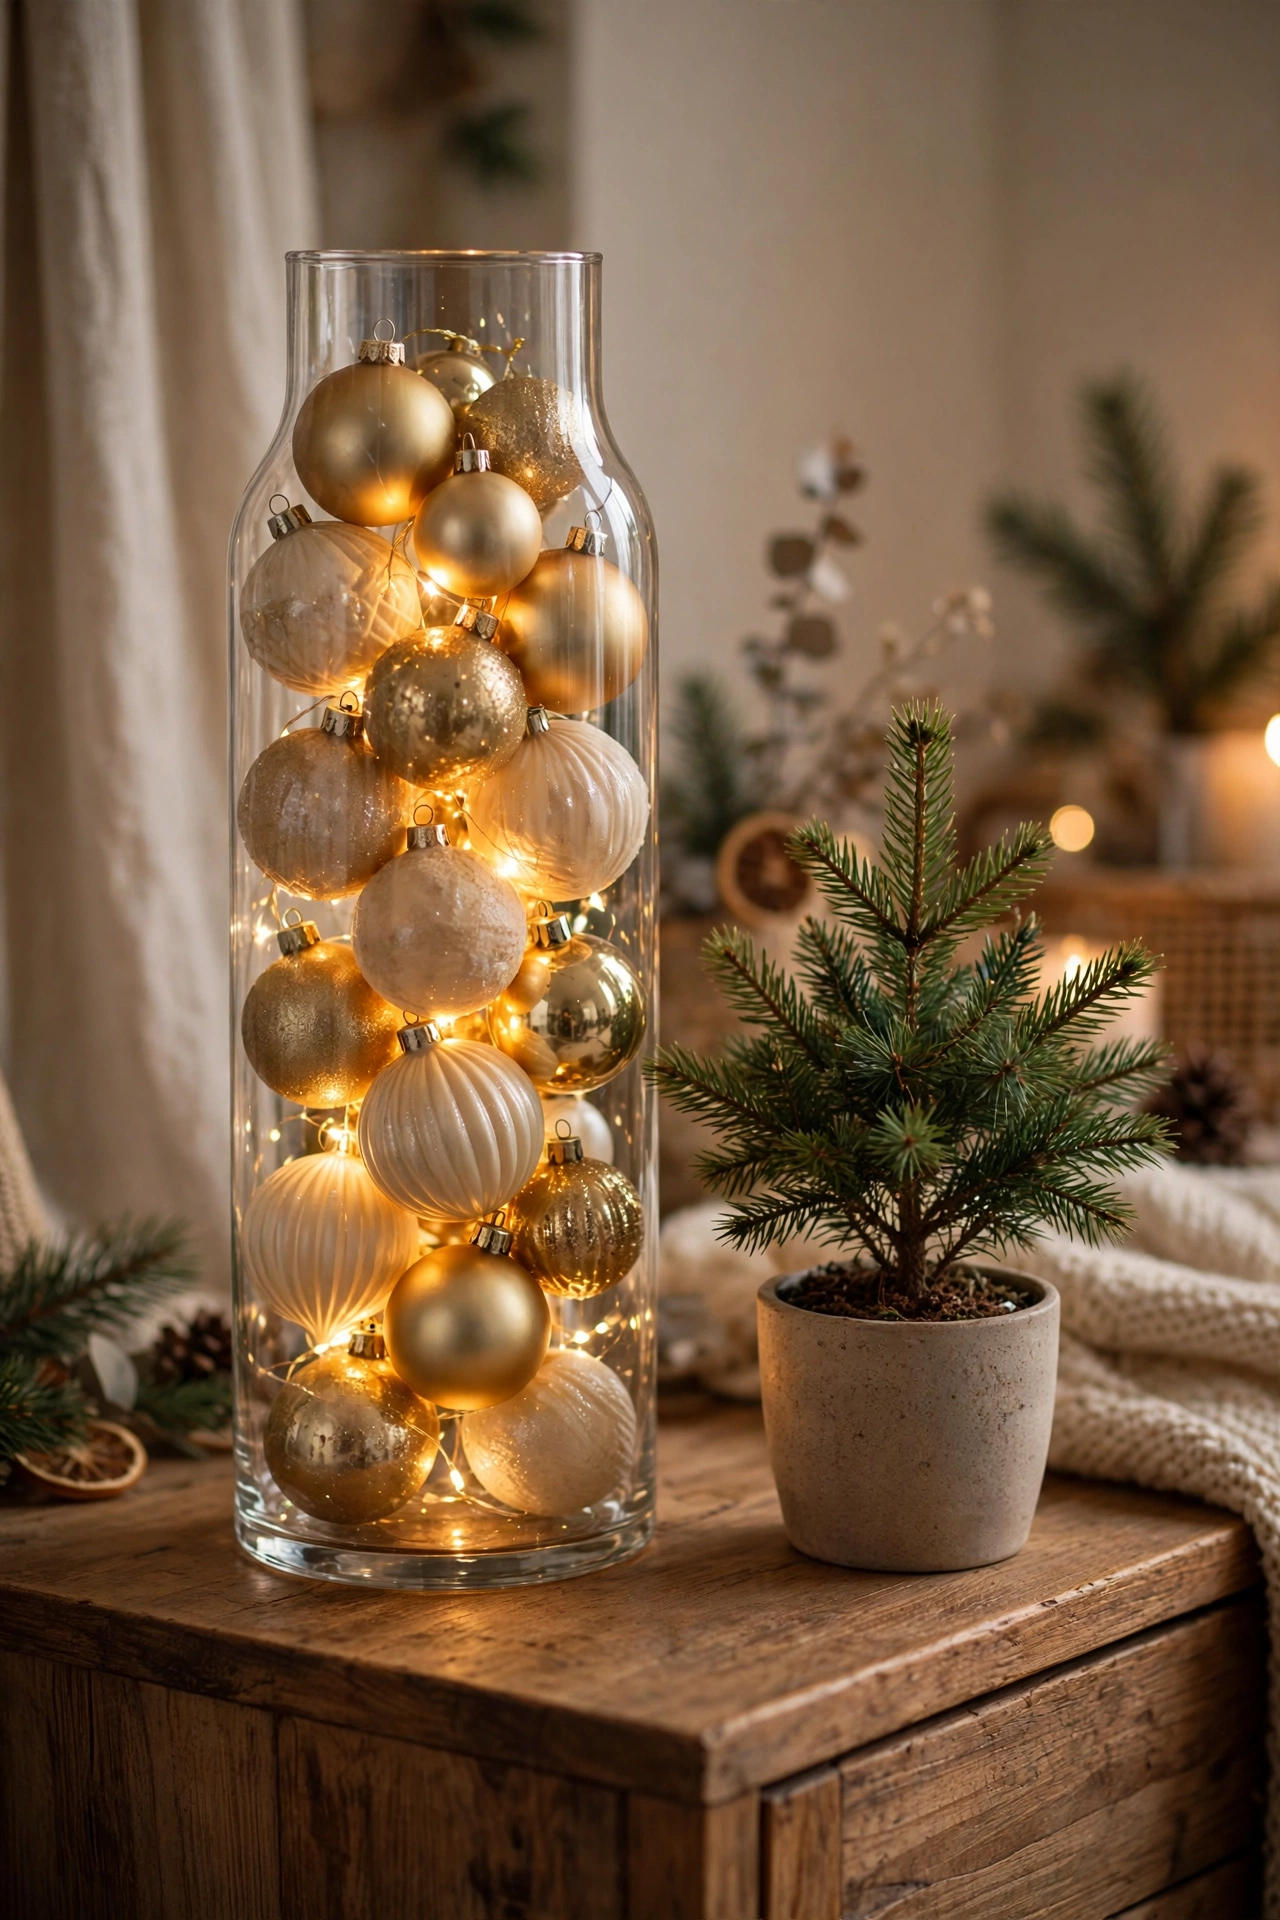
A tall glass vase is the same idea turned vertical. Fill it with ornaments in your palette, largest at the bottom, smallest at the top, and wind a short string of warm fairy lights through them before you close the top with a bow or a sprig of greenery. The lights inside the glass make the whole vase glow, and it works on a sideboard, a console, or a dining table, where a low bowl would disappear behind the serving dishes. A vase display lasts the whole season without watering, without wilting, and without dropping needles on the table, which is more than a fresh centerpiece can say. If the vase is very tall, fill the bottom third with plain filler, crumpled tissue paper or spare baubles in a single colour, so you do not waste your best ornaments where nobody can see them.
The tiered stand is the bowl idea for a small surface. A two or three tier cake stand, filled with small ornaments on each level, turns a side table or a kitchen island into a display that takes up almost no space. Put the largest ornaments on the bottom tier, the medium ones in the middle, and the smallest, prettiest ones on top, where the eye lands. A tiered stand works in a bathroom too, on a vanity or a shelf, with three or four small ornaments per tier and a sprig of greenery. It is the one ornament display that suits a room with no free table space at all, because it goes up instead of out.
The dining table is the last bowl, and the most useful. Scatter ornaments down the center of the table, nestled into a low garland or loose greenery, with candles between them, and the table has a runner that cost you nothing and takes thirty seconds to clear when dinner arrives. Keep the ornaments low, under four inches tall at their highest point, so guests can see across the table, and keep them away from the plates, because an ornament next to a plate is a decoration and an ornament on a plate is a mistake. The Christmas Centerpiece Ideas guide on this site covers the low centerpiece rule in full, and ornaments obey it perfectly, because they are small, shiny, and easy to lift away in one move when the platters arrive.
One warning for every bowl and vase: keep the ornaments out of direct sun and away from radiators. Sun fades red ornaments to pink by January, and heat cracks old glass ornaments. A bowl on a coffee table away from the window will look the same on Christmas Eve as it did on the first of December. A bowl on a sunny windowsill will not. And if you have small children, use shatterproof ornaments in every bowl below waist height, and save the glass ones for the high shelves and the tall vases. A bowl of plastic ornaments that a toddler can touch is a decoration. A bowl of glass ornaments that a toddler can reach is an accident waiting for a quiet afternoon.
Hang Them Where the Eye Travels: Windows, Doors and Chandeliers
Hanging ornaments is the move that makes a room feel alive, because a hanging ornament moves. A gentle turn in the warm air from a radiator, a small sway when someone walks past, and the light catches a different facet every time. No other ornament display does that. A bowl sits still. A hanging ornament dances, and a room with something dancing in it feels like Christmas in a way a room full of still objects never does.
The window is the best hanging spot in the house, and the one most people leave bare. A window dressed with ornaments glows twice, once from the inside light in the evening and once from the daylight behind it in the morning. Hang five to seven ornaments from the curtain rod, or from suction hooks on the glass, on ribbons of three different lengths, short, medium and long, so the group has depth instead of lining up in a row. Space them unevenly, with two close together and one alone, because uneven spacing looks natural and even spacing looks like a shop window. Use ribbon, not string, because ribbon reads as decoration and string reads as a repair. Red velvet ribbon on a white window frame, gold satin ribbon on a dark frame, and plain twine in a rustic room. Tie the ribbon to the ornament cap with a small knot, not a bow, because a bow at the cap fights with the ornament itself. The bow belongs at the top, where the ribbon meets the rod, if you want one at all.
A doorway takes the same idea in miniature. One cluster of three ornaments, hung from a hook above the door frame, at three different lengths, turns a plain doorway into a welcome. Hang the cluster to one side of the doorway, not the center, because the center is where people walk and a swinging ornament at head height is a decoration that hits people. The side of the doorway is where the eye travels anyway, and a cluster there is seen by everyone who enters without being touched by anyone. A doorway cluster works in the entryway, between the living room and the dining room, and at the top of the stairs, where the landing needs one festive touch and has no surface for a bowl.
A chandelier or a pendant light is the most dramatic hanging spot, and the easiest to get wrong. Hang one ornament per arm, or one ornament per light, on short ribbons, low enough to see and high enough to clear heads. The rule is simple: if you can touch it while standing under it, it is too low. A chandelier dressed with ornaments turns a dining room into a Christmas room with no other decoration at all, which is why it suits a small dining room, where the table is already full and the walls are already busy. Use light ornaments here, not heavy glass ones, because a heavy ornament on a chandelier arm pulls the arm down and, in an old fixture, can loosen the fitting. And never hang an ornament from a real candle chandelier or near a real flame. Battery candles only, or no candles at all, when ornaments are hanging above them.
The staircase is the best hanging spot of all, and the one most people leave bare, because the stair garland is already there and the ornaments feel like an extra step. They are not an extra step. They are the step that finishes the garland. Drape the garland along the banister, then hang ornaments from it at intervals of about twelve inches, alternating sizes and finishes so the eye travels down the stairs instead of stopping at one heavy cluster. The Christmas Garland Decor Ideas guide on this site covers the garland itself in full, and the ornaments are the finishing layer, the way jewellery finishes an outfit. Hang the ornaments from the garland with short lengths of ribbon or floral wire, not from the banister itself, because the banister is where hands go and a swinging ornament on a handrail is a decoration that gets knocked off by the third day.
A curtain rod, a branch, and a light fixture are the three hanging spots that cost nothing and need no hooks. A bare branch in a vase, with five or six ornaments hung from it, is a tabletop tree for a room with no floor space. A curtain rod with ornaments hung along it turns a plain window into a display without blocking the light. A pendant light with one ornament hung from it turns a kitchen island into a Christmas kitchen. The principle is always the same: hang where the eye already travels, hang fewer than you think, and hang them at different lengths. Five ornaments in a window look elegant. Fifteen look like a craft fair exploded. Three on a branch look intentional. Ten look like the branch is carrying the whole box.
Tuck Them Into Garland, Wreaths and the Mantel
The tuck is the quietest ornament move and the one that makes the difference between decorated and finished. A garland without ornaments is greenery. A garland with ornaments tucked into it is Christmas. The difference is small, a few ornaments pressed gently into the leaves, and the effect is large, because the tuck connects the garland to everything around it, and the whole wall reads as one composition instead of three separate objects.
Start with the mantel, because the mantel is the focal wall of the living room and the garland on it is the longest garland in the house. Lay the garland along the mantel, fluff the branches, and add the lights first, because lights tucked under the garland glow through the leaves and lights laid on top of it glare. Then tuck the ornaments, one every eight to ten inches, pressed gently into the greenery so each ornament sits in a pocket of leaves rather than on top of them. Cluster them in threes where the garland dips, and leave a single ornament alone where the garland rises, because clusters and singles together look natural and evenly spaced ornaments look like a fence. Use ornaments in your palette, with one shiny, one matte and one textured finish in every cluster, and keep the sizes mixed, with one large ornament anchoring each cluster and two small ones beside it. The mantel garland should look full without a single extra branch, and the ornaments are what make it look full, because they fill the gaps the greenery leaves.
The wreath takes the same idea in a circle. A plain evergreen wreath on the front door is welcoming. A wreath with five or six ornaments tucked into it, in your palette, is memorable. Tuck the ornaments into the wreath at the bottom and the sides, not the top, because the top is where the bow goes and the bottom is where the eye rests. Space them unevenly, with a cluster of three at the lower left and two singles on the right, and wire them in with short lengths of floral wire, not hot glue, because hot glue melts in winter sun on a south facing door and the ornaments fall off by the second week. A wreath with ornaments should still read as a wreath first and an ornament display second. If you cannot see the greenery, you have tucked too many.
The staircase garland is the tuck that most people skip, because the garland is already there and the ornaments feel like extra work. They are five minutes of work and they change the whole staircase. Tuck ornaments into the garland at the newel post, one cluster of three at the bottom, where the eye lands first, and then one single ornament every twelve inches up the stairs, alternating sides so the eye travels. The newel post deserves its own moment: a cluster of three ornaments tied with ribbon at the top of the post, with a small bow, turns the post into a finial. The Christmas Staircase Decor Ideas guide on this site covers the garland lengths and the swag spacing, and the ornaments are the layer that makes the measurements matter, because a garland without ornaments is a green rope and a garland with ornaments is a staircase.
Shelves take the tuck in miniature. One small ornament per shelf vignette, beside a stack of books, in front of a framed photograph, or at the base of a candlestick, and the shelves stop looking like storage and start looking like part of the season. The rule is one per vignette, not one per shelf, because a shelf with three vignettes and three ornaments looks decorated, and a shelf with three vignettes and nine ornaments looks crowded. The ornament should be small, under three inches, because a large ornament on a shelf blocks the books behind it and the photograph beside it. A small ornament tucked into a shelf is a surprise. A large ornament on a shelf is an obstacle.
The dining table is the last tuck, and the most useful. Set ornaments into the table runner, nestled into loose greenery with candles, one ornament every six inches, alternating sizes, and the table has a runner that cost you nothing and takes thirty seconds to clear. Keep the ornaments low and keep them away from the plates. The same rule applies here as on the mantel: clusters and singles together, never even spacing. A table runner of ornaments spaced evenly looks like a production line. A table runner of ornaments clustered in threes, with a candle between each cluster, looks like a table someone decorated with care.
One practical note for every tuck: wire the ornaments in, do not just rest them on the greenery. A tucked ornament that is only resting will fall the first time someone closes a door hard or a child runs past. A short length of floral wire, looped through the ornament cap and around a branch, holds it through the whole season and takes ten seconds per ornament. And when the season ends, the wired ornaments come out with the garland, still in their clusters, which makes next year faster, because the clusters go back in as units instead of one ornament at a time.
The Tree Still Matters: How Many Ornaments and Where They Go
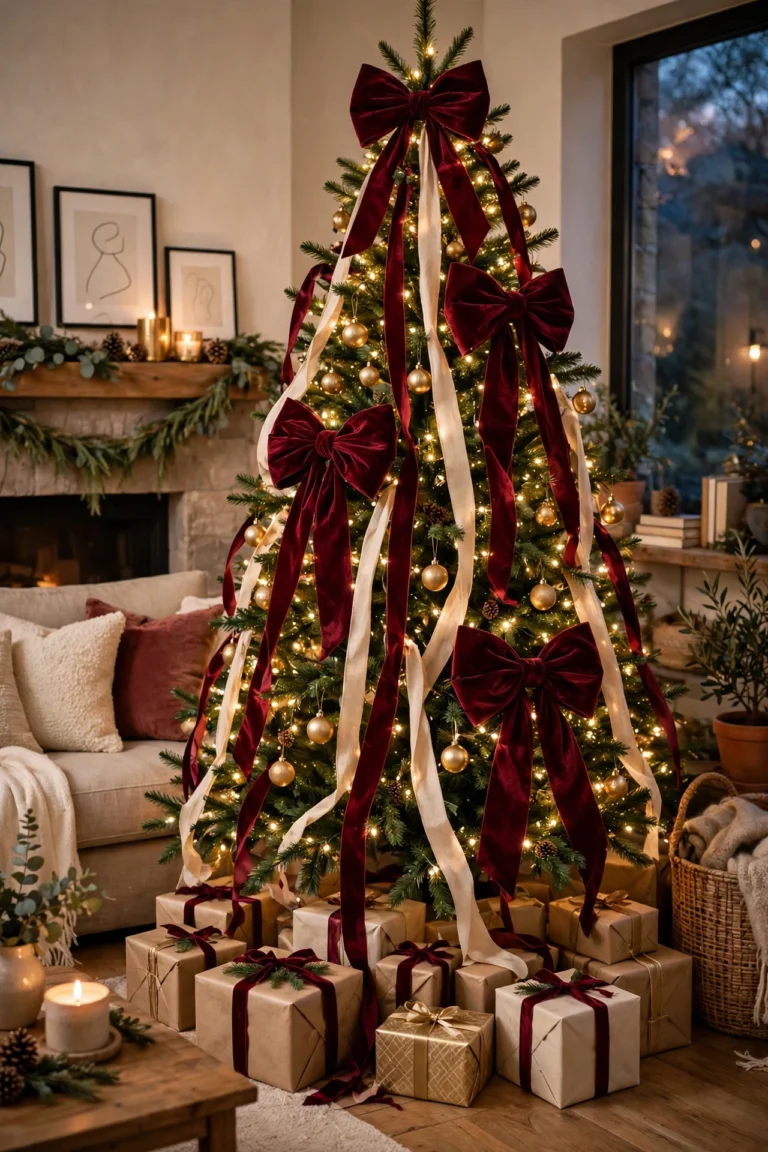
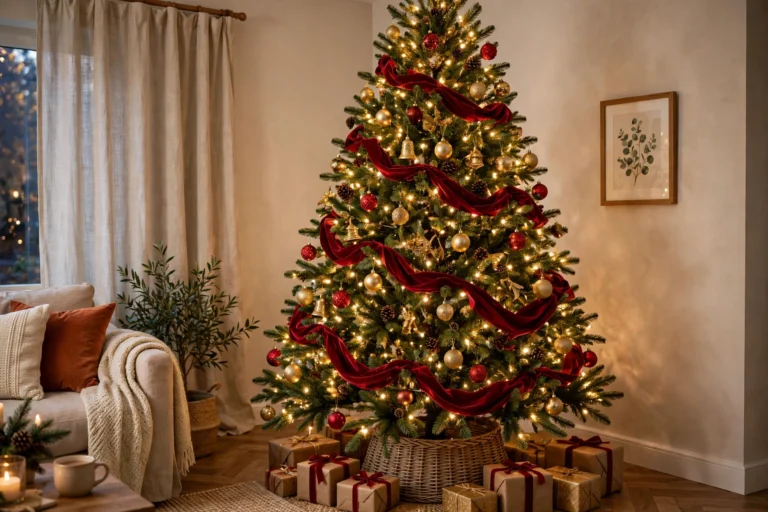
Ornaments may work all over the house, but the tree is still their home, and a tree hung well is still the centerpiece of Christmas. The mistake most people make on the tree is hanging ornaments only on the outside, like baubles on a coat, so the tree looks decorated from the front and bare from the side. A tree hung well has depth, and depth comes from hanging ornaments inside the tree as well as outside it.
Start with the count. A standard seven and a half foot tree takes about 80 to 120 ornaments, with roughly 20 large anchor ornaments for the inner core, 50 medium pieces for the main branches, and 30 to 40 smaller accent pieces for the branch tips. That number surprises most people, because it is more than a tree looks like it holds, but a tree with 40 ornaments looks sparse and a tree with 100 looks full, and the difference is not the tree, it is the count. Count your box before you start. If you own fewer than 80 ornaments, your tree is not under decorated, your tree is telling you to buy one more box in your palette, not to spread 40 ornaments thin and hope nobody notices. The Christmas Tree Decor Ideas guide on this site covers the full tree method, and the count is the part people skip, which is why so many trees look thin at the bottom and bare at the back.
Hang the largest ornaments first, and hang them deep, inside the tree, near the trunk, where the branches are strongest and the ornaments are seen through the greenery rather than on top of it. A large ornament hung deep looks like it belongs to the tree, because the branches frame it. A large ornament hung on a branch tip pulls the branch down and looks like it is falling off. The 20 large anchors go inside, spaced evenly around the tree, with two or three visible from every side. Then hang the medium ornaments on the main branches, working from the top down, in clusters of three, with one shiny, one matte and one textured finish in each cluster, so the tree has rhythm instead of randomness. Then hang the small accent ornaments on the branch tips, where they catch the light and the eye, and where their lightness cannot pull a branch down.
Keep the palette on the tree the same as the palette in the rest of the house. Two main colours and one metal, repeated in every room, is what makes the tree look like it belongs to the house instead of looking like a separate decoration that happens to be in the living room. If your house palette is red and cream with gold, your tree is red and cream with gold. If your house palette is forest green and cream with brass, your tree is forest green and cream with brass. The tree is the biggest ornament display in the house, and it should be the clearest statement of the palette, not an exception to it.
Leave the special ornaments for last. The handmade ones, the ones with a story, the baby first Christmas ornament, the ornament from a trip, the one your grandmother made, these are the ornaments that matter most, and they deserve the best spots: at eye level, on the front of the tree, where they can be seen and talked about. Hang them last, when the tree is already full, so you can see the gaps and place each one where it will be noticed, not where it will be hidden behind a cluster of baubles. And hang them on short hooks, not long ones, because a special ornament on a long hook swings and a swinging ornament is an ornament that falls.
Finally, step back and look at the tree from the doorway, not from two feet away. A tree looks different from across the room, and the gaps show from the doorway in a way they never show from close up. Fill the gaps with the small accent ornaments, not with more large ones, because a gap filled with a large ornament looks like a patch and a gap filled with a small ornament looks like the tree was always full. Add the ribbon last, woven through the branches in a loose spiral, because ribbon hung before the ornaments gets buried and ribbon hung after the ornaments sits on top of them. And when the tree is done, leave it alone. A tree that is finished and left alone looks confident. A tree that is fiddled with every day looks anxious, and guests can tell the difference even if they cannot say why.

DIY Ornaments Worth Making (and the Ones to Skip)
Handmade ornaments are the ones people remember, because they carry a story that a shop bought bauble never will. The wobbly ones end up being favourites, because you remember who painted them and which evening you made them. But not every handmade ornament is worth the evening it takes to make it, and some of the most popular DIY ornament ideas are the ones that look good in a photograph and fall apart by the second week. Make the ones that last. Skip the ones that do not.
The ornaments worth making are the simple ones, made from materials that already exist in your house. Plain wooden ornaments, bought blank or cut from thin wood, painted with a few small paint pots, are the best starting point, because wood takes paint well, it does not break when it falls, and a painted wooden ornament looks better every year as the paint softens. Buy plain wooden baubles, stars, and trees, grab a few small paint pots in your palette, and make an evening of it. The wobbly ones will be your favourites. Salt dough ornaments are the second best, because the dough costs almost nothing, the shapes are easy, and the finished ornaments are light, sturdy, and easy to paint. Roll the dough, cut the shapes, bake them low and slow, and paint them when they are cool. They last for years if they are kept dry, and they are the one handmade ornament children can make without help, which is the point of making them at all.
Dried orange slices are the third, because they are beautiful, they smell like December, and they cost the price of an orange. Slice the oranges thin, dry them low and slow in the oven, and hang them with ribbon or twine, alone or threaded into a garland. They last about three weeks if they are kept dry, which is exactly the length of the decorating season, and they are the one handmade ornament that also scents the room. Paper stars, folded from plain paper bags or kraft paper, are the fourth, because they cost about a dollar each, they take fifteen minutes, and they look like Scandinavian design when they are hung in a group. The paper star is the ornament that proves handmade does not mean homemade, because a group of white paper stars on a tree or in a window looks deliberate and calm.
The ornaments to skip are the ones that depend on glue staying glued in winter air. Glitter ornaments, made by gluing glitter to a bauble, shed glitter on the floor for the whole season and look patchy by the second week, because glitter does not stick to a curved surface evenly. Hot glue ornaments, made by gluing beads or buttons to a bauble, fall apart when the house warms up and the glue softens, and the beads end up in the carpet. Painted pinecones are the exception, because pinecones are the one natural material that takes paint well and holds it, but paint them before you hang them, and let them dry for a full day, because a painted pinecone hung wet stains everything it touches.
The ornaments to make and sell, if you are thinking about it, are the personalized ones. Photo ornaments, family name ornaments, milestone ornaments, and map ornaments are the types that sell best at Christmas, because they are the ones people buy as gifts, and the ones people keep. A photo ornament with a family photograph, a family name ornament that holds twenty names and a pet, a baby first Christmas ornament, and a map ornament showing the street where a couple met, these are the ornaments that carry a story, and a story is what makes an ornament worth more than the material it is made from. The selling guides published this season put personalized ornaments at the top of the demand list, with photo ornaments alone numbering close to a hundred thousand active listings on the big handmade marketplaces, which tells you both that the demand is real and that the competition is fierce, so make the ones that are personal to your family first, and think about selling second.
One rule for every handmade ornament: make them in your palette. A handmade ornament in the house palette looks like part of the plan. A handmade ornament in a random colour looks like a craft project that escaped onto the tree. Paint the wooden ornaments in your two main colours and your metal. Dry the orange slices and hang them with ribbon in your metal. Fold the paper stars in cream or white, which goes with every palette. The palette is what turns a handful of handmade ornaments into a collection, and a collection is what makes a tree look like it was decorated by someone with a plan instead of someone with a glue gun and a free evening.
Small Rooms, Kids and Pets: Ornaments That Survive December
A small room is not a problem for ornaments. It is a size to respect. A small room needs fewer ornaments, hung higher, in smaller groups, and the result is often better than a large room, because the restraint shows. A small living room takes one bowl on the coffee table, one cluster of three ornaments in the window, and one tuck into the shelf garland, and that is enough. The mistake in a small room is trying to use the whole box, because the whole box in a small room looks crowded, and a crowded small room feels smaller. Use a third of the box. Save the rest for the tree, or for next year. The Christmas Decor Ideas for Small Spaces guide on this site covers the small room method in full, and the ornament rule is the same as the room rule: decorate up, not out. Hang the ornaments high, on the window and the shelf, and leave the floor and the table clear for living.
Kids change the ornament plan completely, and the change is simple: everything below waist height must be unbreakable. Shatterproof plastic ornaments, wooden ornaments, felt ornaments, and paper ornaments go in the bowls, on the low shelves, and on the bottom third of the tree. Glass ornaments go above waist height, on the top two thirds of the tree, in the tall vases, and in the window, where small hands cannot reach them. The bottom third of the tree is the kids tree, and it should be decorated by the kids, with their handmade ornaments, their paper stars, and their salt dough shapes, because a tree decorated by children is a tree children love, and a tree children love is a tree children do not pull apart. Hang the special ornaments, the glass ones, the heirlooms, and the ones with a story, above the reach of the smallest child in the house, and tell the children which ornaments are theirs to touch and which are for looking. Children who are told what they can touch do not touch what they cannot, because the rule is clear. Children who are told not to touch anything touch everything, because the rule is impossible.
Pets need the same plan, with one extra rule: nothing that looks like food and nothing that dangles at tail height. Dried orange slices are beautiful and they smell like food to a dog, so hang them high or skip them in a house with a dog that eats things. Ornaments hung on long ribbons at tail height will be batted by a cat, and a batted ornament is a broken ornament, so hang the window ornaments short in a house with a cat, or hang them on a curtain rod the cat cannot reach. A bowl of ornaments on a coffee table is a cat toy in a house with a cat, so put the bowl on a sideboard or a high shelf instead, or use a tall vase with a narrow neck that a paw cannot reach into. The ornaments themselves are not the danger. The danger is an ornament hung where a pet can reach it, and the fix is always the same: hang it higher.
A rental home, or a home with strict rules about nails and hooks, needs the same system with different fixings. Suction hooks hold ornaments on windows and mirrors. Removable adhesive hooks hold garland and clusters on walls and door frames. Ribbon tied around a curtain rod, a banister, or a shelf bracket holds ornaments without a single hole. A bowl needs no fixing at all. A vase needs no fixing at all. A tiered stand needs no fixing at all. The whole ornament system, bowl, hang, and tuck, works in a rental, because only the hanging move needs a hook, and a removable hook is a hook. The landlord will never know, and the deposit will never notice.
Finally, the budget version of this whole guide costs almost nothing, because the ornaments are already in your box. A bowl you own, ribbon you own, greenery from the garden or the park, and the ornaments you already have, that is a decorated house. If you want to buy one thing, buy one box of 20 ornaments in your palette, in mixed finishes, for the gaps in the tree and the bowl. If you want to buy two things, add a roll of velvet ribbon in your metal. That is the whole shopping list. The guides that tell you to buy a new ornament collection every year are selling ornaments, not decorating houses. Your house is decorated with the ornaments you already own, used in more places than you thought they could go.
Conclusion
Ornaments are not tree decor. They are a whole decorating system, and the system is three moves: bowl, hang, and tuck. A bowl on the coffee table, ornaments hung in the window, and ornaments tucked into the garland on the mantel, all in one palette, all from the box you already own. That is the whole plan, and it works in every room, in a small room, in a house with kids, in a house with pets, and in a rental where you cannot put a single nail in the wall.
Start this weekend, not next weekend, because the sorting takes an hour and the decorating takes an afternoon, and the house will glow for the whole month after that. Open the box, sort by colour and finish, choose the palette, and count what you have. Then bowl first, hang second, and tuck last, room by room, until the house reads as one decorated home instead of ten separate piles of things. The tree still matters, and it still gets the best ornaments, hung deep and clustered in threes, with the special ones at eye level. The handmade ones still matter, and the wooden ornaments, the salt dough shapes, the dried orange slices, and the paper stars are the ones worth making, in your palette, on an evening when the house is warm and the radio is on.
The ornaments you already own are enough. The bowl is already in your cupboard. The ribbon is already in a drawer. The greenery is outside the door. Put them together, in one palette, in three moves, and your house will look like the houses in the photographs, not because you bought more, but because you used what you had in more places. That is the secret the guides never quite say out loud: a decorated house is not a house with more decorations. It is a house where the same decorations show up in more rooms, and the eye reads the repetition as style. Your ornaments are ready. The box is open. Start with the bowl.