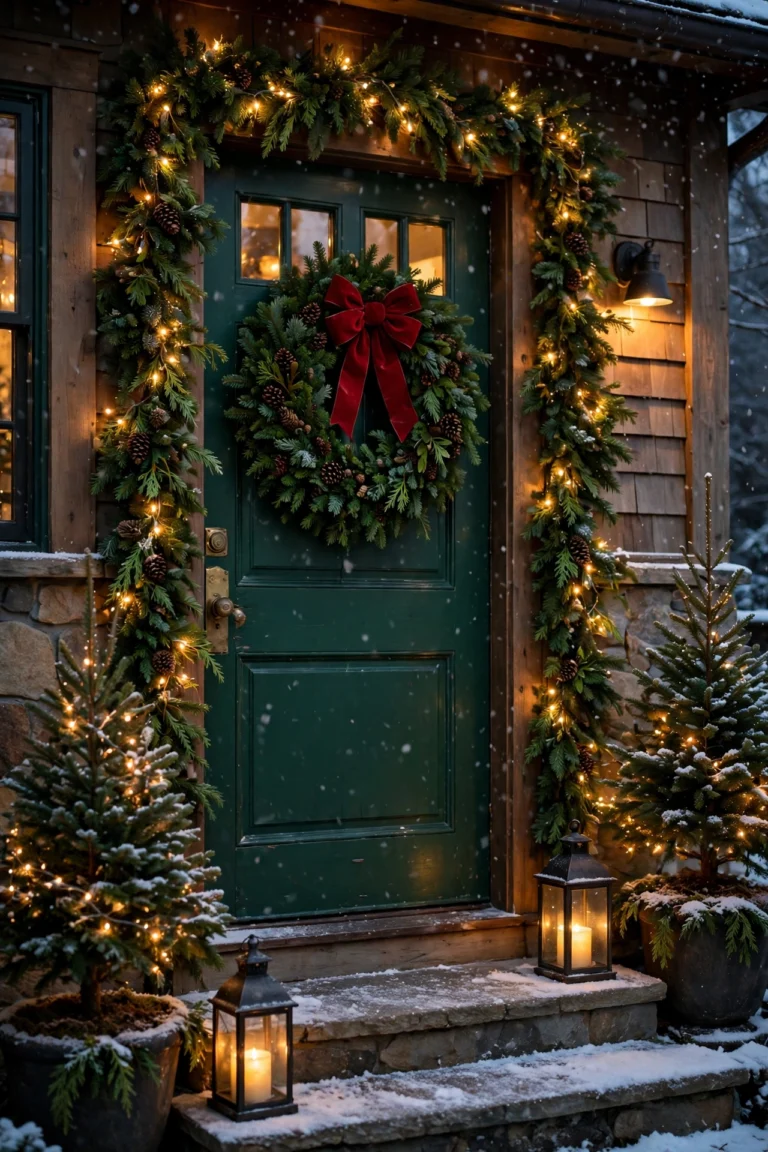

Christmas Village Decor Ideas That Glow All December
A Christmas village is the one decoration that changes personality twice a day. In daylight it is a charming little town, cottages and trees and a church with a snowy lane running between them. After dark it becomes something else entirely, every window glowing amber, the snow catching the light, the whole town lit from inside like a place where people are home and warm. That double life is why the village is the most saved Christmas display of the season, and why the fresh 2026 guides agree on the same point: the glow is the whole point, and everything else in the display exists to serve it.
The guides published this November say it plainly. The Styling Hub, in a 35 idea guide published November 10, 2026, opens with the line that a village changes personality twice a day and the glow after dark is what the display is built for. DIY Idea Tip, in an October 2026 guide, says a great village comes down to three things: tiered levels so every house gets seen, fluffy snow that hides cords and bases, and warm LED light that makes the windows glow. Addicted to Organization, in a 30 idea roundup updated in September 2026, shows the same ideas again and again: mantel towns, tiered trays, farmhouse crates, table centerpieces, and dollar store villages that cost almost nothing. The pattern is clear. A village does not need a big budget or a big collection. It needs levels, snow, warm light, and a little patience in the layout.
The system in this guide is built on those three things, plus one more: a story. A village is not a row of houses. It is a town, and a town has a center, a street, a church, shops, trees, lamp posts, and people on their way home. Put the church in the middle, step the cottages down toward the ends, run a lane of snow between them, light the windows, and the display reads as a place. Line the houses up in one flat row with no levels and no lane, and it reads as a shelf of ornaments, however pretty the houses are.
You do not need a collection of twenty houses to start. Three houses, a handful of bottle brush trees, a bag of cotton batting and a pack of LED tea lights will build a village that glows beautifully on a mantel, a console, a windowsill or a tiered tray. This guide starts with choosing the spot, then the levels that make a village read as a town, the snow that hides everything ugly, the lights that make the windows glow, the building order that works every time, the trees and figures that tell the story, the small space versions, and finally a one hour starter village for under $40. One spot, three houses, warm light, and a town that glows all December.
Start With the Spot: Mantel, Console, Shelf or Table
Every good village starts with the spot, not the houses. The spot decides how big the village can be, how many levels it can hold, and whether anyone will actually see it glow in the evening. A village on a mantel is seen from every seat in the living room, at eye level, close to candlelight and stockings. A village on a console in the entryway is passed a dozen times a day, and it becomes the welcome. A village on a dining table is seen up close at dinner, and it has to be low and movable. A village on a windowsill is seen from the street at dusk, and it has to be simple, because a sill is narrow and the glass does the framing. Pick the spot first, and the village will fit it. Buy the houses first, and the village will fight the spot all December.
The mantel is the classic spot, and for good reason. It is at eye level, it is close to the fire and the candlelight, and it is the focal point of the room, so the village gets seen in the evening when the lights come on. A mantel village wants length more than depth: a long low surface where the town can stretch out, the church in the middle, cottages stepping down toward the ends, trees filling the gaps. The mantel depth matters too. Most mantels are 8 to 10 inches deep, which is enough for one row of houses and a lane of snow in front, but not enough for a deep town with streets running back. If your mantel is shallow, build the village as a street, one row of buildings along the back edge, a lane of snow in front, and the trees and lamp posts marking the kerb. If your mantel is deep, you can build two rows, the tall buildings at the back on a riser, the small cottages at the front, and a lane running between them.
The console table is the second best spot, and in some homes it is better than the mantel, because a long low console gives the village more horizontal room for streets and scenes. Our Christmas Entryway Decor Ideas guide covers the console as a welcome, and a village is the most welcoming thing you can put on one. A hallway console makes a high street: shops and houses in a row, passed a dozen times a day, with a lane of snow in front and mini lamp posts along the kerb. Keep the display shallow, 12 to 18 inches deep, so it does not eat the whole surface, and hang a wreath or a garland on the wall above to frame it. Leave the key bowl end clear, because a village that blocks the keys will be moved in a week.
The sideboard and the dresser are the quiet heroes of village decorating. A sideboard in the dining room holds a tiered village beautifully, because the surface is long and low and the village can cascade down three or four levels. A kitchen dresser is display furniture already, so the village simply moves in for December: a small cluster of houses at eye level, a drift of snow against the crockery, bottle brush trees standing in cups. The mix of the useful and the miniature is what makes a dresser village charming rather than staged. The rule for both is the same: keep the front two inches of the surface clear, so the village has a clean edge and nothing falls off when someone reaches past it.
The table is the spot for a small village, and the windowsill is the spot for a quiet one. A dining table village has to be a centerpiece, which means it has to be low, movable, and built on a tray, so it lifts away in one hand when the platters arrive. A coffee table village wants the same treatment, on a wooden tray or a shallow platter, with three or four houses at most. A windowsill village is a single line of houses and trees with no scenery at all, and it looks magical at night because the glass turns the glow into a soft reflection. The sill needs a deep ledge, at least 6 inches, and the houses need to sit back from the glass so the condensation does not reach them.
The spot also decides the power. A village needs light, and light needs a power source or batteries. A mantel or a console near an outlet can run a short strand of warm white fairy lights hidden behind the houses. A windowsill or a table in the middle of a room cannot, so it needs battery LED tea lights inside the houses and battery fairy lights tucked behind them. Check the outlet before you build, not after, because a village built around a cord you cannot plug in will sit dark all December. And check the light in the room at night, because a village that glows beautifully in a dark living room can look washed out in a bright kitchen. The spot with the dimmest evening light is the spot where the village will shine.
Build Levels First: The Tiering System That Makes a Village Read as a Town
Tiering is the single biggest upgrade a village can get, and it is the difference between a town and a row of houses. A flat row of houses on a flat surface reads as a shelf of ornaments, because every roof is at the same height and the eye has nowhere to travel. Three levels, with the church on the highest tier and the cottages cascading down, read as a real town, because real towns have hills, and the eye follows the rooftops up and down the way it follows a street. The 2026 guides agree on this point more than any other: build the levels first, drape the snow over them, and place the houses second.
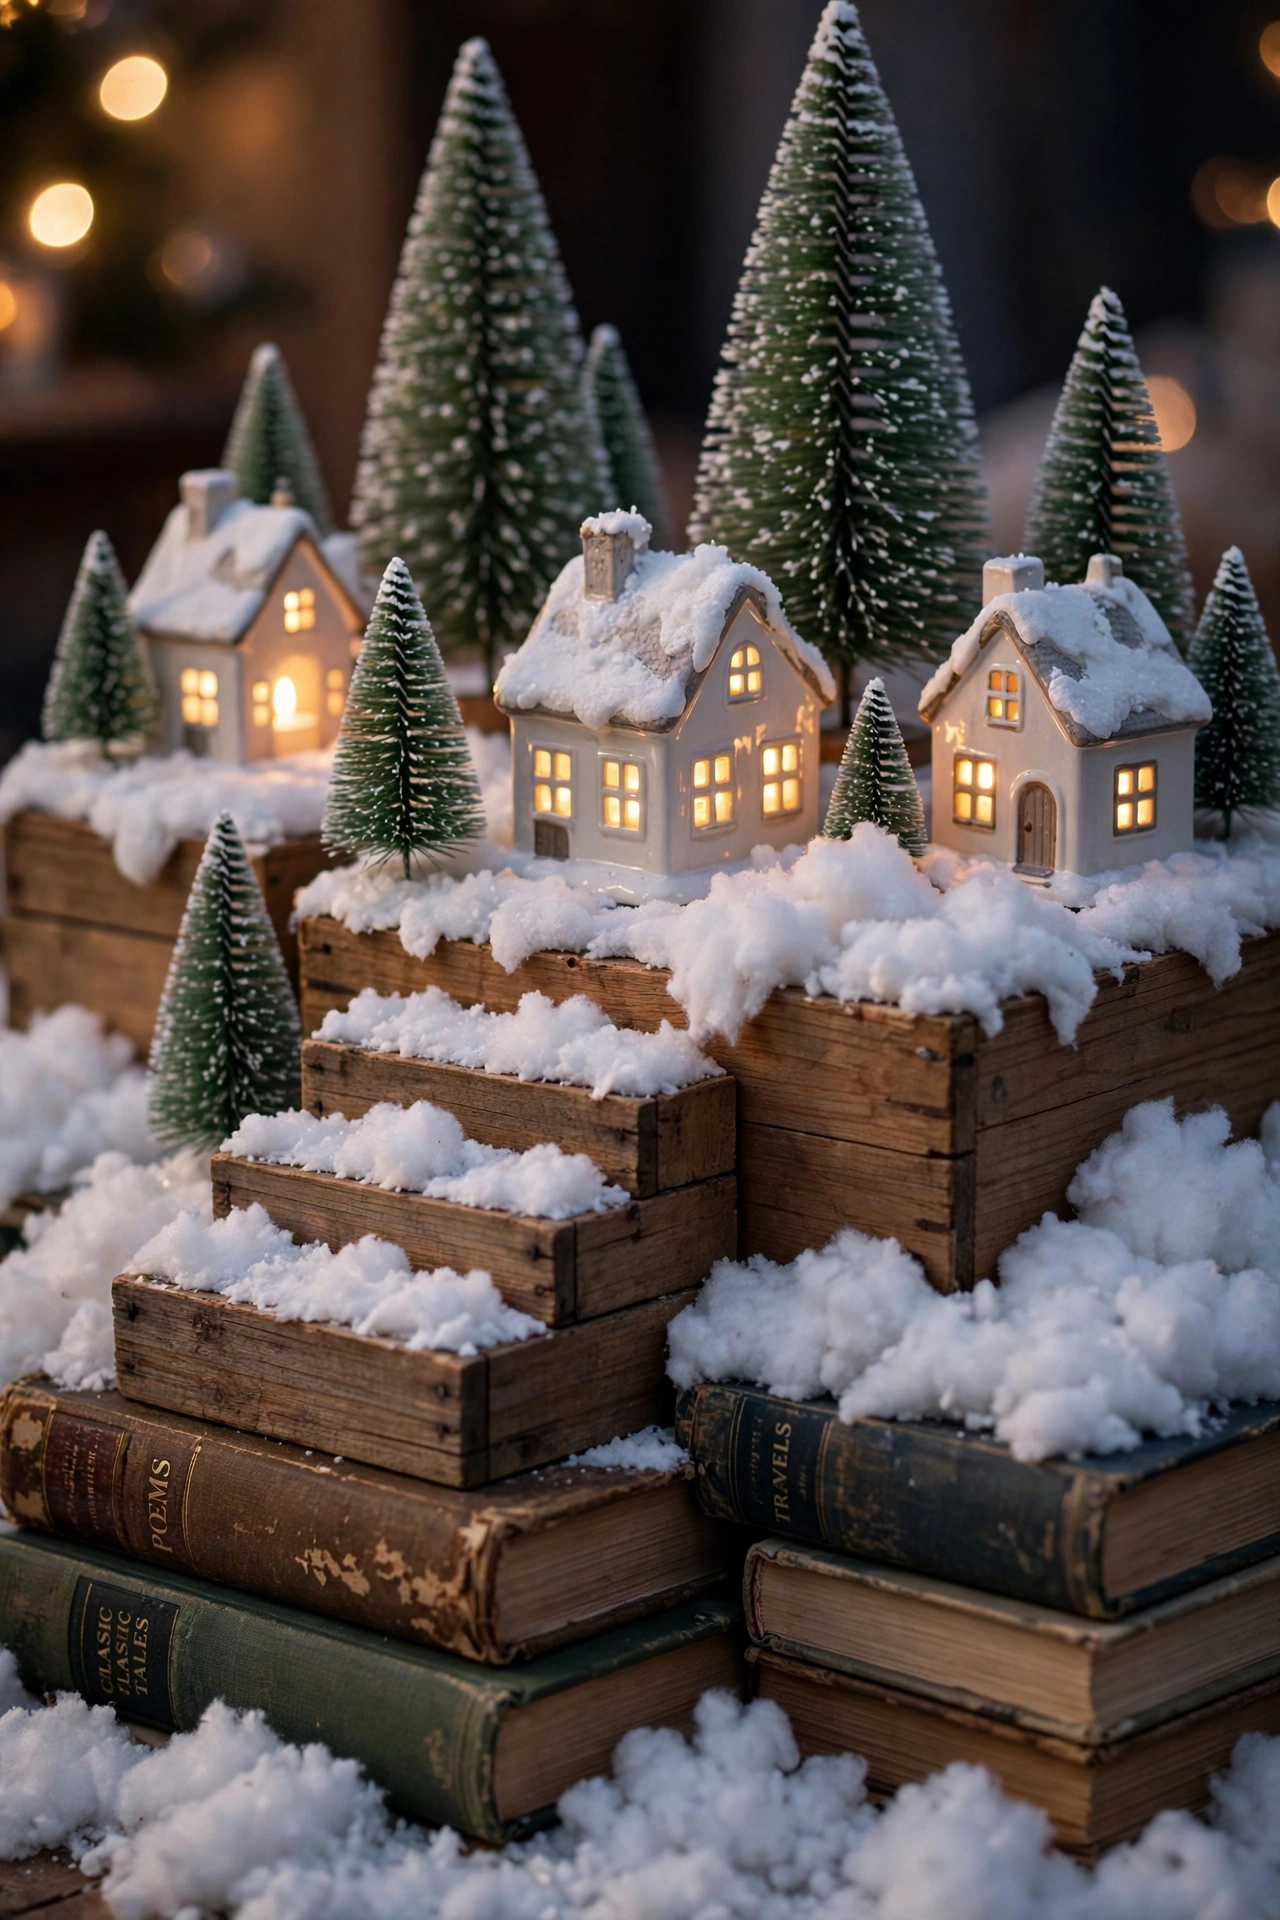
The materials for levels are already in your house. Hardcover books, wooden boxes, overturned baskets, sturdy bowls, cake stands, wooden crates, and risers all work, and the rule is simple: the tallest level goes in the middle or at the back, the middle level steps down on either side, and the lowest level sits at the front. A mantel village wants two or three stepped levels across the mantel, built from books or boxes under a white cotton cloth. A sideboard village can hold three or four levels, with the church on the highest tier and cottages cascading down toward the ends. A table village can use a single cake stand to hold the church, a low wooden riser to hold the cottages, and the rest of the town filling in around the base at table level.
Build the tiers before you place a single house. Lay the books and boxes out on the bare surface, step back, and check the shape from the doorway. The shape you want is a gentle hill or a staircase, not a pyramid and not a cliff. A hill rises in the middle and falls toward the ends, and it suits a mantel or a long console. A staircase rises from one end to the other, and it suits a sideboard against a wall or a shelf. Either shape works, but the levels must be stable. A wobbling stack of books under a ceramic house is a disaster waiting for the first bump, so test each level by pressing down on it before the snow goes on. If it rocks, rebuild it with a flatter base.
Drape the snow over the tiers in one piece. Cotton batting, the quilt filling kind, about $8 for a big bag at a craft store, is the standard, and the trick is to unroll it thick over the levels, tucking it around each base so it looks like drifts, and smoothing it into the valleys between the levels. One piece of batting, smoothed over the whole town, looks like snow. Ten small pieces, tucked around each house separately, look like cotton wool. Let the batting spill a little over the front edge of the mantel or the sideboard, because a drift that falls off the edge sells the illusion that the snow is real. Keep the batting away from real candles, because cotton batting and an open flame should never be neighbours, and use LED lights only.
The heights matter, and the numbers are simple. The back row of buildings should sit 4 to 6 inches higher than the front row, because that is enough to lift the rooftops clear of the houses in front without making the town look like a staircase. The church, the tallest building, should sit on the highest tier in the middle, and it should be at least 2 inches taller than the tallest cottage, so it reads as the center of the town. The trees should step down with the houses, tall trees at the back, short trees at the front, so the skyline falls gently from the middle toward the ends. If a house disappears behind the house in front of it, raise it half an inch with a book or a piece of foam board under the snow. If a house towers over its neighbours, lower it or move it to a lower tier.
Test the levels at night before you finish the display. Turn the room lights off, switch the village lights on, and look at the town from the doorway. The glow should step up and down with the levels, windows lighting at different heights, the church glowing highest, the cottages glowing lower. If the glow is flat, the levels are flat, and the town needs one more tier at the back. If one house blocks the light of the house behind it, move it half an inch to the side. The night test is the real test, because a village is a display that lives after dark, and the levels that look good in daylight are not always the levels that glow well at night.
Lay the Snow: Cotton Batting, Fake Snow and Bases That Disappear
Snow is the base of the village, and it does more work than any house in it. Snow hides the books and boxes under the levels, it hides the cords, it hides the bases of the houses, and it turns a collection of objects on a shelf into a landscape. Without snow, a village is a row of houses on a piece of furniture. With snow, it is a town in winter. The guides are unanimous on the material: cotton batting is the secret weapon, and the bag costs about $8 at a craft store, which makes it the cheapest upgrade in the whole display.
Cotton batting is the quilt filling kind, sold in rolls or bags, and the technique is to unroll it thick, at least an inch deep, over the whole surface before a single house goes on. Tuck it around the base of each house so the house looks planted in a drift, not placed on a cloth. Smooth it into the valleys between the levels, and let it pile a little higher at the back, where the snow would naturally drift against a wall or a garland. The batting should cover the edges of the books and boxes completely, because a visible book corner breaks the illusion at once. If you can see the level, the snow is too thin. Add another layer.
Fake snow, the loose granular kind sold in bags for about $5, does a different job. It is the scatter snow, the light dusting over the batting that catches the light and makes the surface sparkle. Sprinkle it over the batting after the houses are placed, a light handful at a time, focusing on the lane in front of the houses and the rooftops of the cottages. A little goes a long way, and the mistake is to pour the whole bag on at once, which buries the lane and makes the town look like it has been hit by a blizzard. The lane should stay readable, a clear path of snow between the houses, with the scatter snow heaviest at the edges and lightest in the middle, where the tiny figures would walk.
Mirror tiles are the quiet trick for a frozen pond or a skating rink. A small square of mirror tile, about $4 at a craft store, laid flat on the batting and edged with a little scatter snow, reads as ice at once, and it reflects the warm lights from the windows, which doubles the glow. Place the mirror at the front of the village, off to one side, with two or three bottle brush trees around it and a tiny figure or two on the ice, and the town has a gathering place. A skating pond is the easiest centerpiece in a village, because it creates a clear spot where the eye rests, and it needs no building at all.
The bases of the houses need hiding too, and snow does most of it, but a few houses will still show a plastic base or a cord. The fix is simple: tuck a small roll of batting around the base, and if the cord still shows, run it under the batting and out the back of the display, behind the garland or the wall. Never run a cord across the front of the village, because the eye will follow it at once. If a house has a visible battery pack, hide it behind the tallest house or under a drift at the back, and mark the spot with a tree so you can find the switch. The switches are the one thing you must be able to reach without lifting a house, so place every battery pack at the back edge, where your hand can reach it, and never under a house.
Keep the snow clean through December. Cotton batting picks up dust, and a grey drift is worse than no drift at all. A quick shake outside once a week keeps it white, and a fresh handful of scatter snow on top revives the sparkle. If you have a cat, the snow will need more care, because cats love cotton batting, and a village on a low table is an invitation. A mantel or a high shelf is the cat safe spot, and a low table village needs a cloche or a glass dome over the smallest scene, which is a display in itself. The snow is the cheapest part of the village and the part that needs the most looking after, and a clean white drift is what makes the whole town glow.
Light the Windows: Warm Glow Without Cords Showing
Light is the whole point of a Christmas village, and the rule is simple: warm light only, and light the houses before anything else. A village with unlit houses is a daytime display, however pretty the houses are. A village with warm windows glowing is a town at night, even if the houses are plain white ceramic. The light should come from inside the houses, not from a spotlight above them, because the glow of a window is what makes a house look lived in, and a spotlight from above makes a house look like a museum piece.
LED tea lights are the workhorse, about $6 to $10 for a 12 pack, and they tuck inside each ceramic house to make every window glow warm. The warm white kind, 2700K, is the only colour to buy, because cool white lights turn a cozy village into a shop window, and coloured lights turn it into a fairground. One tea light per house is enough for a small house, two for a large house or a church, and the light should be placed low inside the house, near the floor, so the windows glow evenly rather than flaring at the roof. Test each house before you place it, because a tea light with a dying battery glows orange and dim, and one dim house in a row of bright ones looks like a house with the lights off.
Battery fairy lights do the second job, the glow behind and between the houses. A short strand of warm white micro lights, tucked behind the back row of houses and woven through the garland behind the village, creates a halo that makes the whole town glow, and it hides the gaps between the houses where the wall would show through. The strand should sit behind the houses, never in front of them, and the wire should be buried in the batting. If you can see the wire, bury it deeper. If the strand has a visible battery pack, hide it behind the tallest house at the back, with the switch facing out so you can reach it.
Real candles have no place inside a village. The cotton batting, the paper houses, the bottle brush trees and the wooden figures are all flammable, and a real flame beside them is a fire waiting for a draught. LED pillar candles in glass holders can sit at the ends of the mantel, a foot away from the nearest house, and they add a warm flicker to the room without any risk to the village. The rule is a foot of clear space between any flame and any part of the village, and no flame ever inside a house, on a roof, or under a tree. The village glows with LEDs, and the room glows with candles, and the two never touch.
Timers are the small luxury that makes a village feel effortless. A battery tea light with a built in timer, or a fairy light strand with a timer plug, switches the village on at dusk and off at bedtime without anyone touching it, and the village is glowing when the family comes home in the evening, every evening, without a thought. Set the timer for the hours the room is actually used, usually 5pm to 10pm, and the batteries will last the whole season. Without a timer, the village will be lit when someone remembers and dark when they forget, and a village that is dark half the evenings is a village that is half wasted. The timer costs a few dollars and it is the best money in the whole display.
Check the glow from the street as well as from the sofa. A village on a mantel or a windowsill is visible from outside in the evening, and the warm windows are the prettiest thing a house can show the street in December. Stand outside at dusk, look at the windows, and check that the glow is even, that no house is dark, and that no cord is visible from the street. If a house is dark, its tea light needs a new battery. If the glow is uneven, move the brightest house to the middle, where it anchors the town, and the dimmest to the ends, where it matters less. The village is a display for the people inside the house and the people walking past it, and the glow should be good from both sides.
Place the Buildings: Church in the Middle, Cottages Stepping Down
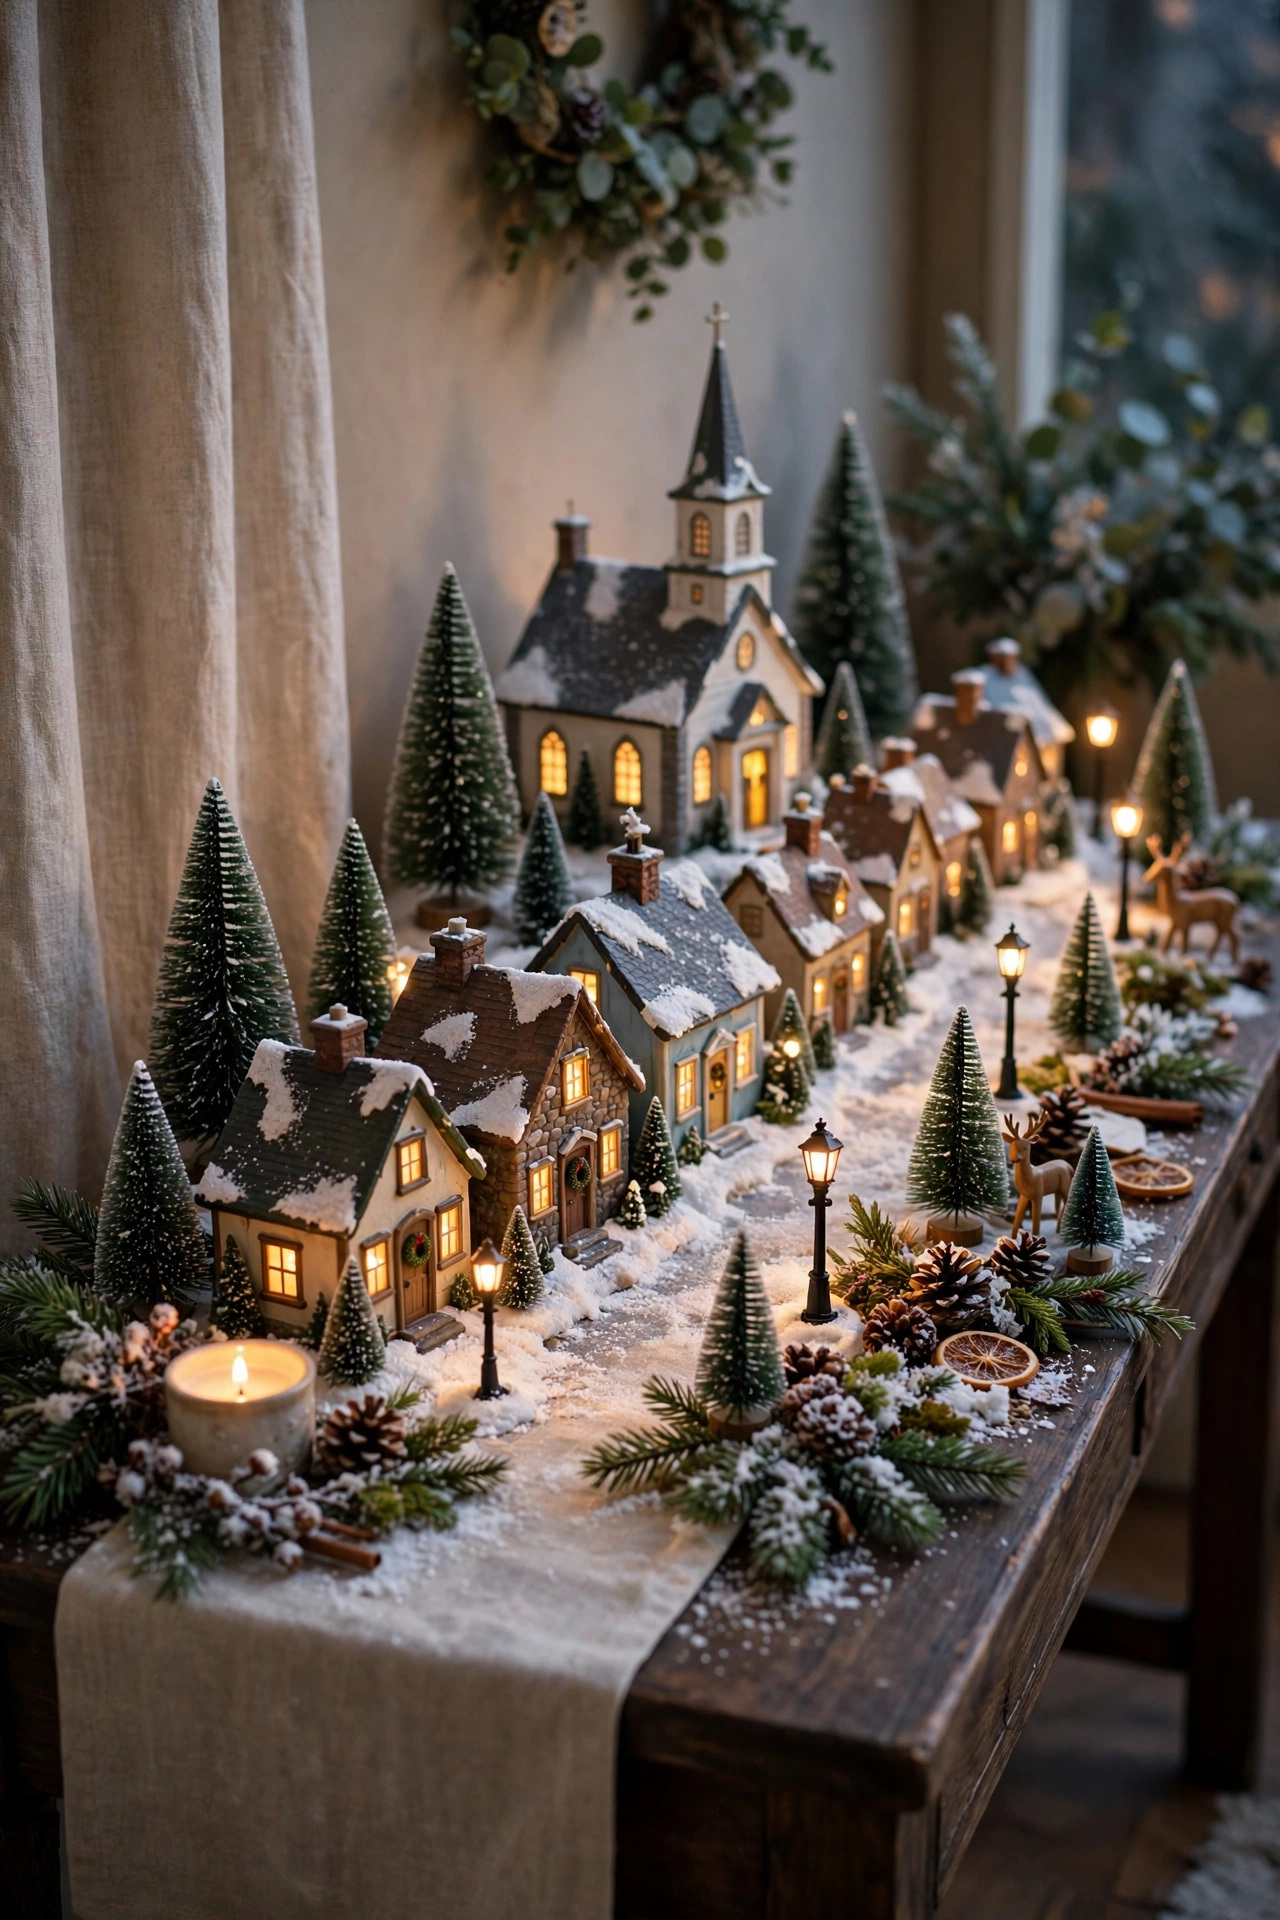
A village is a town, and a town has an order. The church goes in the middle, on the highest tier, because it is the tallest building and the center of the town. The shops and the large houses go beside it, one step down. The cottages go at the ends, stepping down toward the edges, smallest at the far ends. The trees fill the gaps, the lamp posts mark the lane, and the figures walk the street. That order works every time, on a mantel, a console, a sideboard or a tray, and it is the order the 2026 guides use in every example, from the mantel magic village to the tiered tray wonderland.
Start with the church, and place it before anything else. The church is the anchor, and everything else is placed in relation to it. Put it in the middle of the highest tier, facing forward, with its steeple clear of anything above it. If the mantel has a mirror or a picture above it, the church should sit below the frame, not in front of it, because a steeple hidden behind a frame looks like a mistake. If the church is lit, switch it on first and check the glow, because the church is the brightest light in the town and it sets the standard for the rest. A church that glows warmly makes the cottages look warm. A church that is dark makes the whole town look dark.
Place the large houses next, one on each side of the church, one step down in height. These are the shops, the bakery, the toy workshop, the town hall, the buildings with the most detail and the most windows. Face them slightly toward the middle, the way buildings on a real street face the square, and leave a gap of an inch or two between them and the church, so the rooftops do not merge into one shape. The gap matters, because two buildings touching read as one building, and the town loses a house. A finger width of snow between two houses is enough to keep them separate.
Place the cottages last, stepping down toward the ends. The cottages are the smallest houses, and they go at the far ends of the display, one or two on each side, with a bottle brush tree between them. The smallest cottage should sit at the very end, at the lowest level, so the skyline falls gently from the church in the middle to the trees at the edges. If you have more cottages than ends, do not squeeze them in. A crowded village looks like a shop shelf, and a village with five houses and space between them looks like a town. Put the extra cottages on a second display, a windowsill or a shelf, and let them have their own small town.
Leave a lane. The lane is the strip of snow in front of the houses, 2 to 3 inches wide, running the whole length of the display, and it is the most important empty space in the village. The lane is where the figures walk, where the lamp posts stand, and where the eye travels from one end of the town to the other. Without a lane, the houses sit at the edge of the mantel and the town has no street. With a lane, the town has a front, and the display reads as a place with a foreground and a background. Keep the lane clear of houses, trees and cords, and mark it with two or three tiny lamp posts, one near the church, one near each end, so the street has a rhythm.
Step back and check the town from the doorway, in daylight and at night. The skyline should rise in the middle and fall toward the ends. The gaps between the houses should be even, not wide in one place and crowded in another. The church should be the first thing the eye finds, and the cottages should be the last thing it leaves. If one house draws the eye away from the church, it is too big for its spot, or too brightly coloured, and it needs to move to a lower tier or a different display. A village is not a competition between houses. It is a town, and the town is bigger than any one building in it.
Add Trees, Figures and Lamp Posts: The Details That Tell the Story
The houses make the town, but the trees, the figures and the lamp posts make it a story. A village with houses and no trees is a model, not a place. A village with houses, trees, lamp posts and a few tiny people on their way home is a town with a life in it, and the eye will stay on it longer, because there is something to look at in every corner. The details are cheap, a pack of bottle brush trees costs about $12, a set of lamp posts costs a few dollars, and a handful of figures costs less than a coffee, but they are the difference between a display and a scene.
Bottle brush trees are the first detail, and they do two jobs at once. They soften the hard edges of the houses, and they make the whole display feel outdoorsy, like a town with a forest at its edge. The rule is to mix the heights: tall trees at the back, behind the houses, where they fill the gap between the rooftops and the wall; medium trees between the houses, where they break up the row; short trees at the front, along the lane, where they frame the street. A tree that is taller than the house beside it looks wrong, because a real tree beside a cottage is taller than the cottage, but a miniature tree that towers over a miniature house breaks the scale. Keep the trees a little shorter than the house they stand beside, and the scale will hold.
The colours of the trees matter too. Green bottle brush trees are the classic, and they suit a traditional red and green village. Frosted white trees suit a white ceramic village, and they make the snow look deeper. Pink or pastel trees suit a whimsical village, and they should only be used if the houses are pastel too, because a pink tree beside a red cottage is a clash. One colour family for the trees, the same family as the houses, and the town will read as one plan. A dozen trees in three colours will read as a craft box, not a town.
Figures are the second detail, and the rule is few and placed with purpose. Three to five figures are enough for a whole village, and they should be placed on the lane, not on the rooftops and not in the snow drifts. A figure carrying shopping near the bakery, a figure with a dog near the church, two figures talking by a lamp post, a child with a sled near the skating pond: each figure is a small story, and the stories should be spread along the lane, one near each end and one in the middle, so the eye travels the whole street. Ten figures in one spot look like a crowd, and a crowd in miniature reads as clutter. One figure, placed well, is worth more than a dozen placed at random.
Lamp posts are the third detail, and they are the smallest light in the village. Tiny lamp posts along the lane, one near the church, one near each end, say streets, evenings, and people on their way home, and they do it with a single warm glow each. The lamp posts should be battery lit or unlit, never wired, and they should stand in the snow along the front edge of the lane, where they mark the kerb. A lamp post that leans will fall at the first bump, so press the base firmly into the batting and check it stands straight before you step back. A leaning lamp post is the one detail the eye finds at once, and it is the easiest to fix.
The final details are the ones that make the town feel lived in. A tiny wreath on a cottage door, a string of micro lights along a roofline, a small sign that says bakery or toy shop, a sleigh with presents beside the church, a bench on the lane where a figure can sit: these are the touches that reward a close look, and they are the reason guests lean in to a village rather than glancing at it. Add one or two of these, not ten, because a village crowded with accessories stops being a town and starts being a jumble. The test is the same as the test for the houses: step back to the doorway and look. If the details draw the eye along the street, they are right. If they pull the eye in ten directions at once, take half of them away.
Small Space Villages: Tiered Trays, Windowsills and One Shelf
A small home does not need a small village. It needs a village that fits the space it has, and the small space versions are often the prettiest, because they force you to edit. A tiered tray village, a windowsill village, a one shelf village, and a coffee table village all work on the same principle: three houses, a few trees, warm light, and nothing extra. The guides call the tiered tray the perfect compact village, and they are right, because a tray turns a small display into a complete town in a footprint no bigger than a dinner plate.
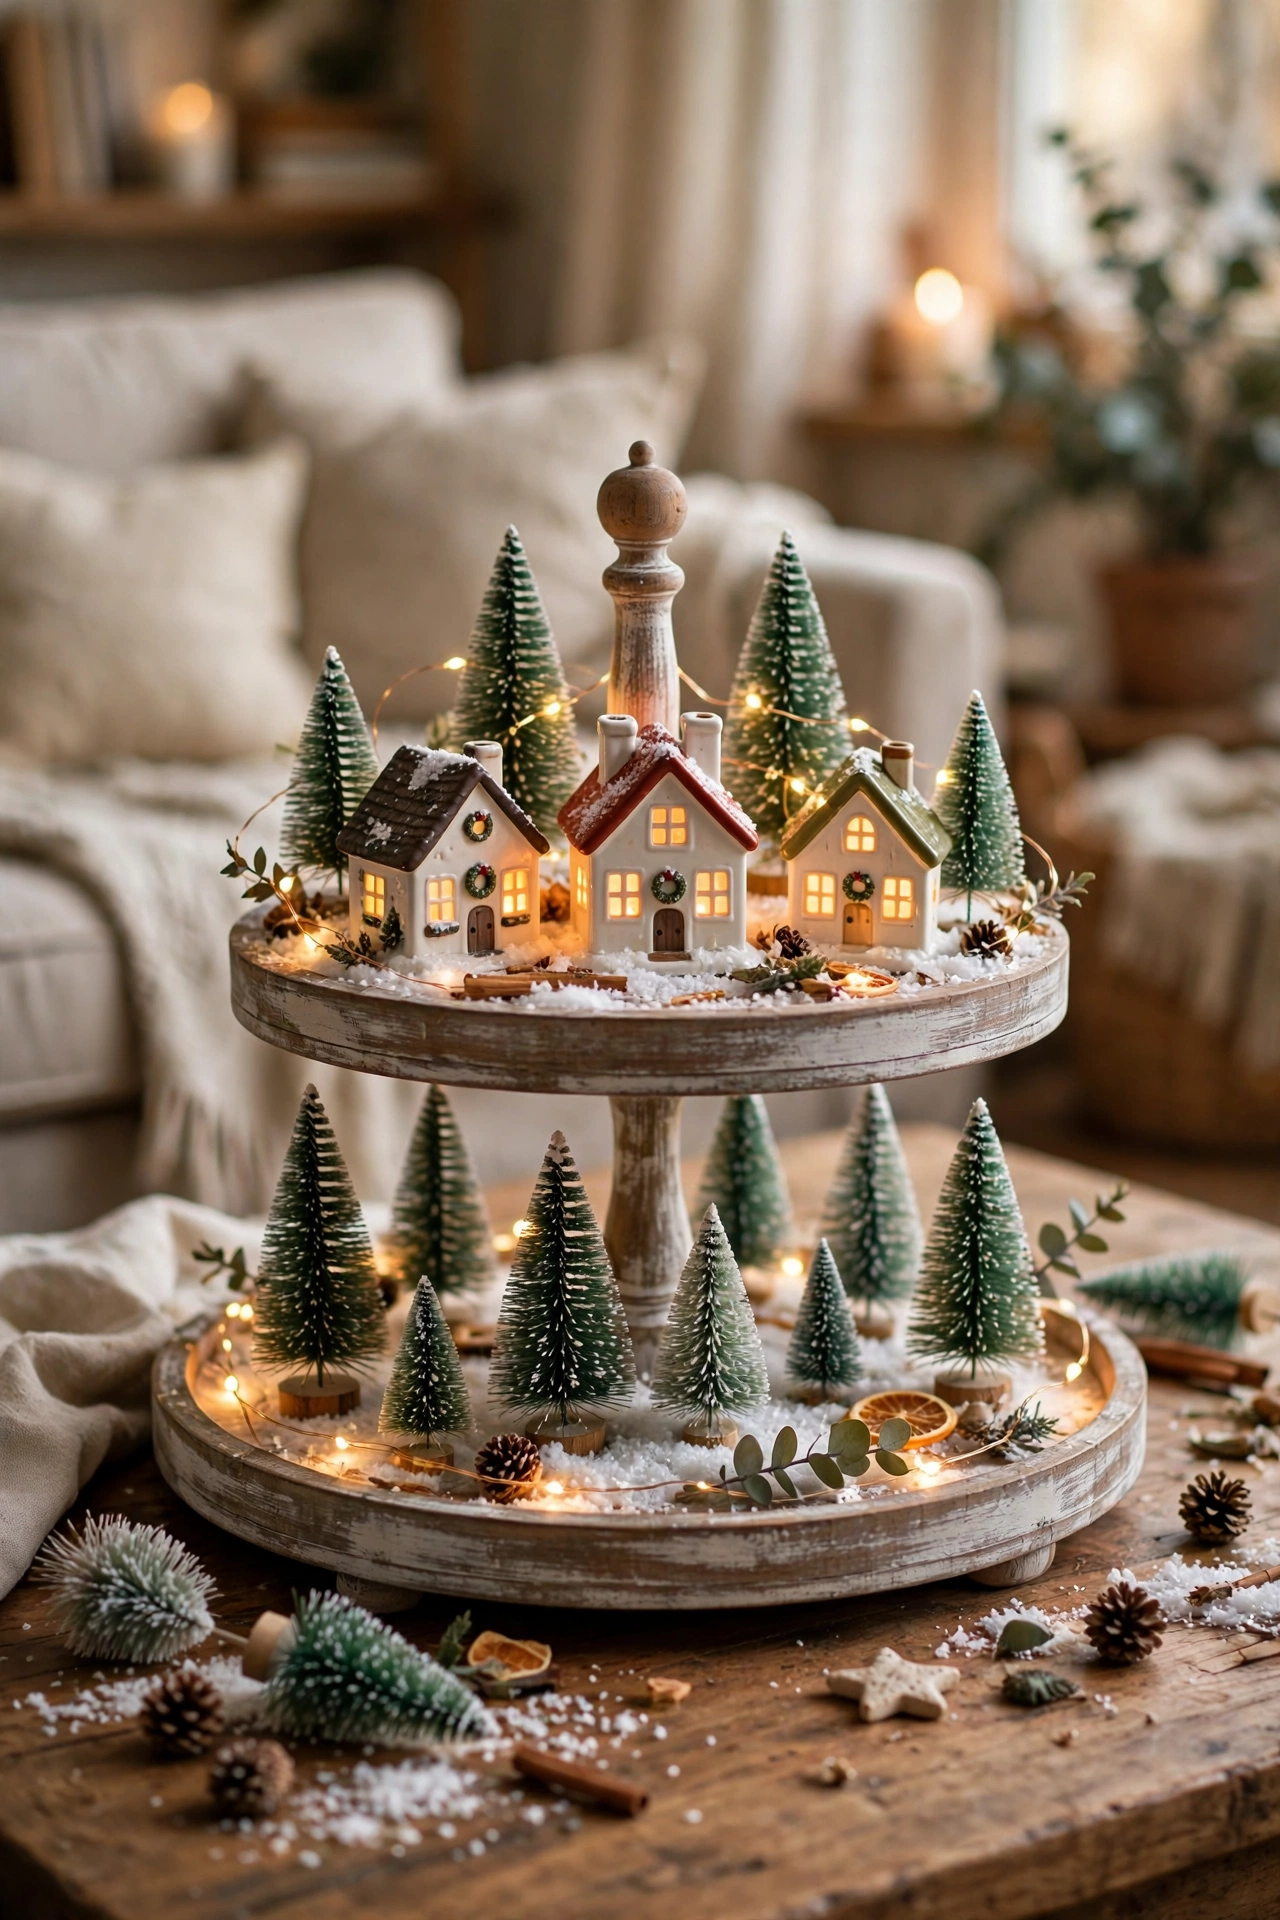
The tiered tray is the best small space village there is. Grab a two or three tiered tray and turn it into a compact, layered village. Use faux snow or glitter to create the base on each tier. Place the largest house and the church on the bottom tier, work your way up with smaller houses and trees, and add a string of micro lights for extra sparkle. The tray works because the tiers are built in, so the levels that make a mantel village read as a town are already there, and the whole display can be carried from the kitchen to the living room in one hand. A tiered tray village on a coffee table, a kitchen island, or a side table is a complete display, and it needs no mantel at all.
The windowsill village is the quietest version, and it suits a home with no mantel and no console. A deep windowsill holds a single line of houses and trees with no scenery at all, and it looks magical at night because the glass turns the glow into a soft reflection. Choose a sill at least 6 inches deep, lay a strip of batting along it, place three or four houses in a row with a tree between each pair, and tuck a battery tea light inside each house. The sill village should be simple, because a sill is narrow and the glass does the framing, and the houses should sit back from the glass so the condensation does not reach them. The sill village is seen from the street, so check it from outside at dusk, and make sure the glow is even and no cord shows.
The one shelf village is the version for a bookshelf or a floating shelf. Install a single long shelf on an empty wall, or clear one shelf of a bookcase, lay a white felt or snow blanket as a base, arrange a handful of houses, and hang a string of icicle lights or twinkle lights along the front of the shelf. The shelf village works because it is at eye level and it is framed by the shelf itself, like a picture. Keep the display shallow, one row of houses and a lane of snow in front, and keep the top of the shelf clear, because a shelf village with objects piled above it looks crowded. A ladder shelf is the vertical version: each rung holds a different section of the village, a different neighbourhood, with its own houses, trees and lights, and the whole ladder reads as a town climbing a hill.
The coffee table village is the version for the room where the family actually sits. Turn the coffee table into a festive focal point with a wooden tray or a decorative platter, a small village scene with just a few houses, a handful of trees, and some lights, and the best part is that it is easy to move when it is mealtime or when guests arrive. The tray is essential, because a village on a bare coffee table will be knocked over by the first cup of tea, and a tray keeps the snow and the houses together. Three houses, four trees, one strand of battery lights, and a tray: that is a complete village, and it costs less than a takeaway dinner.
The small space rule is the same as the big space rule: levels, snow, warm light, and a story. A small village with levels reads as a town. A small village without levels reads as a few houses on a tray. The difference is a cake stand under the church, a book under the back row, a tray with a raised edge. Small spaces are not a problem for a village. They are a reason to build the village properly, because the small version has nowhere to hide a flat row.
The One Hour Village: A Starter Display for Under $40
If you have never built a village, start with the one hour version. It costs under $40, it takes an hour from the first box to the last light, and it will glow beautifully on a mantel, a console, or a table. The shopping list is short: three small ceramic houses, about $15 for the set at a craft store or a dollar store; a pack of bottle brush trees, about $12; a bag of cotton batting, about $8; a 12 pack of LED tea lights, about $8; and a bag of fake snow, about $5. That is about $37 in total, and you probably own a tray, a cake stand, and a few hardcover books already, which are the levels.
Set the timer for an hour and work in order. First ten minutes: choose the spot and clear it. Wipe the mantel or the console, check the outlet or the batteries, and lay the books and the cake stand out to make the levels. The church house will go on the cake stand in the middle, the two cottages will go on the books on either side, one step down. Second ten minutes: drape the batting over the levels in one piece, tuck it around the bases, smooth it into the valleys, and let it spill a little over the front edge. Third ten minutes: place the houses. Church in the middle on the cake stand, cottages stepping down on either side, a finger width of snow between each house, a lane of snow in front. Fourth ten minutes: place the trees. Tall trees behind the houses, medium trees between them, short trees along the lane, a little shorter than the house they stand beside. Fifth ten minutes: light it. One tea light inside each house, a short strand of battery fairy lights tucked behind the back row, and a mirror tile at the front for a frozen pond if you have one. Last ten minutes: scatter the fake snow, place two or three figures on the lane, step back, and check the glow with the room lights off.
The one hour village will not be a collector’s display, and it does not need to be. It will be a town that glows, with a church in the middle, cottages stepping down, trees filling the gaps, and warm windows after dark. And it will teach you the system: levels first, snow second, houses third, trees fourth, light last. Build it once, live with it for a week, and you will know exactly what to add next year: a fourth house, a lamp post, a skating pond, a train loop under the tree. The village grows one piece a year, and the one hour version is the first piece.
The budget version has one more advantage: it is the version you can build with children. A child can place the trees, scatter the snow, and choose where the figures walk, and a village built with a child is a village that will be remembered, long after the houses are packed away. Keep the fragile ceramic houses for the high shelf, and let the child build a second small village on a tray with cardboard houses and paper trees, the way the DIY guides show. Two villages, one on the mantel and one on the tray, and the house has a town for the grown ups and a town for the children, and both of them glow.
Conclusion
A Christmas village is not a purchase. It is a system, and the system is simple enough to remember: pick the spot, build the levels, lay the snow, light the windows, place the church in the middle and the cottages stepping down, add the trees and the figures that tell the story, and keep the lane clear. Levels, snow, warm light, and a story. That is the whole guide in one line, and it is the line the 2026 guides repeat in every version, from the mantel magic village to the tiered tray wonderland.
Start small. Three houses, a bag of cotton batting, a pack of tea lights, and an hour on a weekend will build a village that glows all December, and it will teach you more about decorating than a cart full of houses bought in one afternoon. Add one piece a year, a church, a lamp post, a skating pond, a train, and the village will grow with the family, one December at a time. The houses will last for decades if you store them properly, wrapped in tissue, labelled by room, in a box that opens first next year.
And when the lights come on in the evening, and the windows glow amber, and the snow catches the light, and the little town sits on the mantel like a place where people are home and warm, you will understand why the village is the most saved Christmas display of the season. It is not a decoration. It is a town, built by hand, in your house, and it glows all December.