Christmas Console Table Decor Ideas That Still Work
Introduction
A console table is the first piece of furniture most guests see when they walk into your home at Christmas, and it is also the last thing they see on the way out. It sits in that in between space, part hallway, part living room, part welcome. It holds keys and mail on ordinary days, and at Christmas it can hold the whole feeling of the season in one neat line. The trick is not to buy more things. The trick is to arrange the things you already love in a way that looks calm, warm and finished, even when someone drops a bag on the floor beside it and a coat is hanging over the chair.
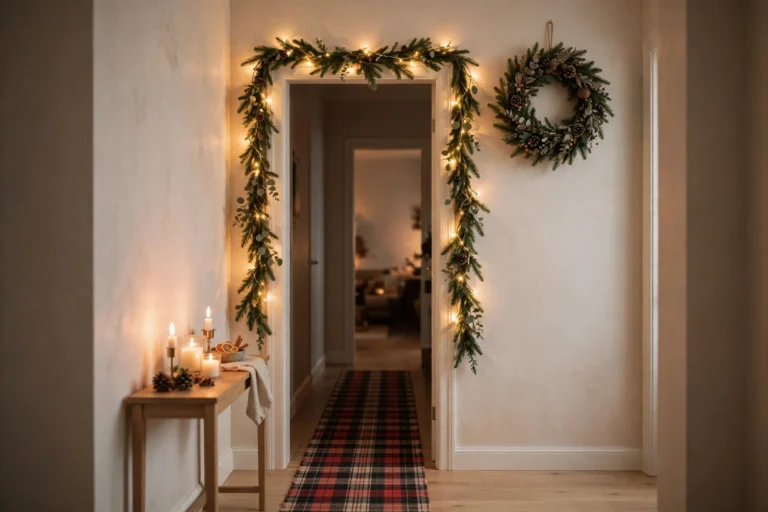
This guide gives you a simple plan you can follow in one afternoon, with things you can move, swap and reuse. You do not need a wide hallway or a new table. You need a clear idea of what goes where, one strong focal point, and enough empty space for the table to still do its real job. If you are planning the whole entrance as well, start with these Christmas entryway decor ideas to set the mood for the front door, then look at these Christmas hallway decor ideas if your console sits in a longer passage, and finish the story in the living room with these Christmas fireplace decor ideas so the entry and the main room feel like one home, not three separate displays.
Before you start, clear the table completely. Take everything off, wipe it down, and look at the bare surface for a minute. Notice where the light falls, where the wall behind it is plain, and where people naturally reach when they come in. That empty view tells you where the anchor should go, where the middle should stay clear, and where a low tray or a small tree will sit without blocking the way. Work from that empty table, one layer at a time, and step back after each layer. If a layer makes the table look busy, take one thing away before you add the next.
1. The Console Formula: Anchor, Middle, Low, Line, Below
Every beautiful console table follows the same quiet pattern, even when the styles look completely different. Think of it in five parts: anchor, middle, low, line, below. The anchor is the tall thing that gives the table a focal point. The middle is the clear space that keeps it useful. The low part is a tray or a short stack that grounds the display. The line is the garland or runner that runs along the back edge and ties the pieces together. Below is the space under the table, where a basket or a row of gifts finishes the look without taking up any surface at all.
Start with the anchor. In most homes the anchor is a wreath or a mirror on the wall above the table, with one tall object on the table itself to echo it. That tall object might be a mini tree at one end, a tall candlestick, a vase with branches, or a lantern. It should sit at one end, not in the centre, so the eye moves across the table instead of stopping in the middle. If you put two tall things of the same height at both ends, the table can look like a pair of bookends. One tall anchor and one medium height piece at the other end feels more natural and more relaxed.
The middle is the part most people forget, and it is the part that makes the whole display feel calm. Leave at least a third of the top clear, right in the centre, with nothing standing on it. That clear third is what lets the table breathe. It is also what lets you put down a bag, a parcel, or a tray of drinks without knocking something over. When you look at photos of consoles you love, you will often find that clear middle is there, even if you did not notice it at first. The greenery, the candles and the baubles sit to the sides and along the back, and the centre stays open.
The low part sits in front of the line, close to the front edge, and it should be short and contained. A wooden tray, a shallow bowl, a stack of two books with a small ornament on top, or a low cluster of pinecones all work well here. Keep it low so it does not block the view of the garland behind it, and keep it inside a tray or a defined shape so it reads as one group, not as loose clutter. If you can lift the whole low group in one move, you have got it right. That is the test we will return to later, because a console that cannot be cleared quickly will not survive a busy December evening.
The line is the horizontal thread that joins the anchor to the low group and to the other end. Usually that line is a garland along the back edge, or a runner, or a row of small lights tucked into greenery. It does not need to be thick or expensive. It needs to be continuous, so the eye travels from one end to the other without a gap. If your garland is thin, add a second strand, or tuck in extra sprigs, pinecones and ribbon to fill the thin spots. If it is too thick, pull it forward a little so it does not hide the wall behind it.
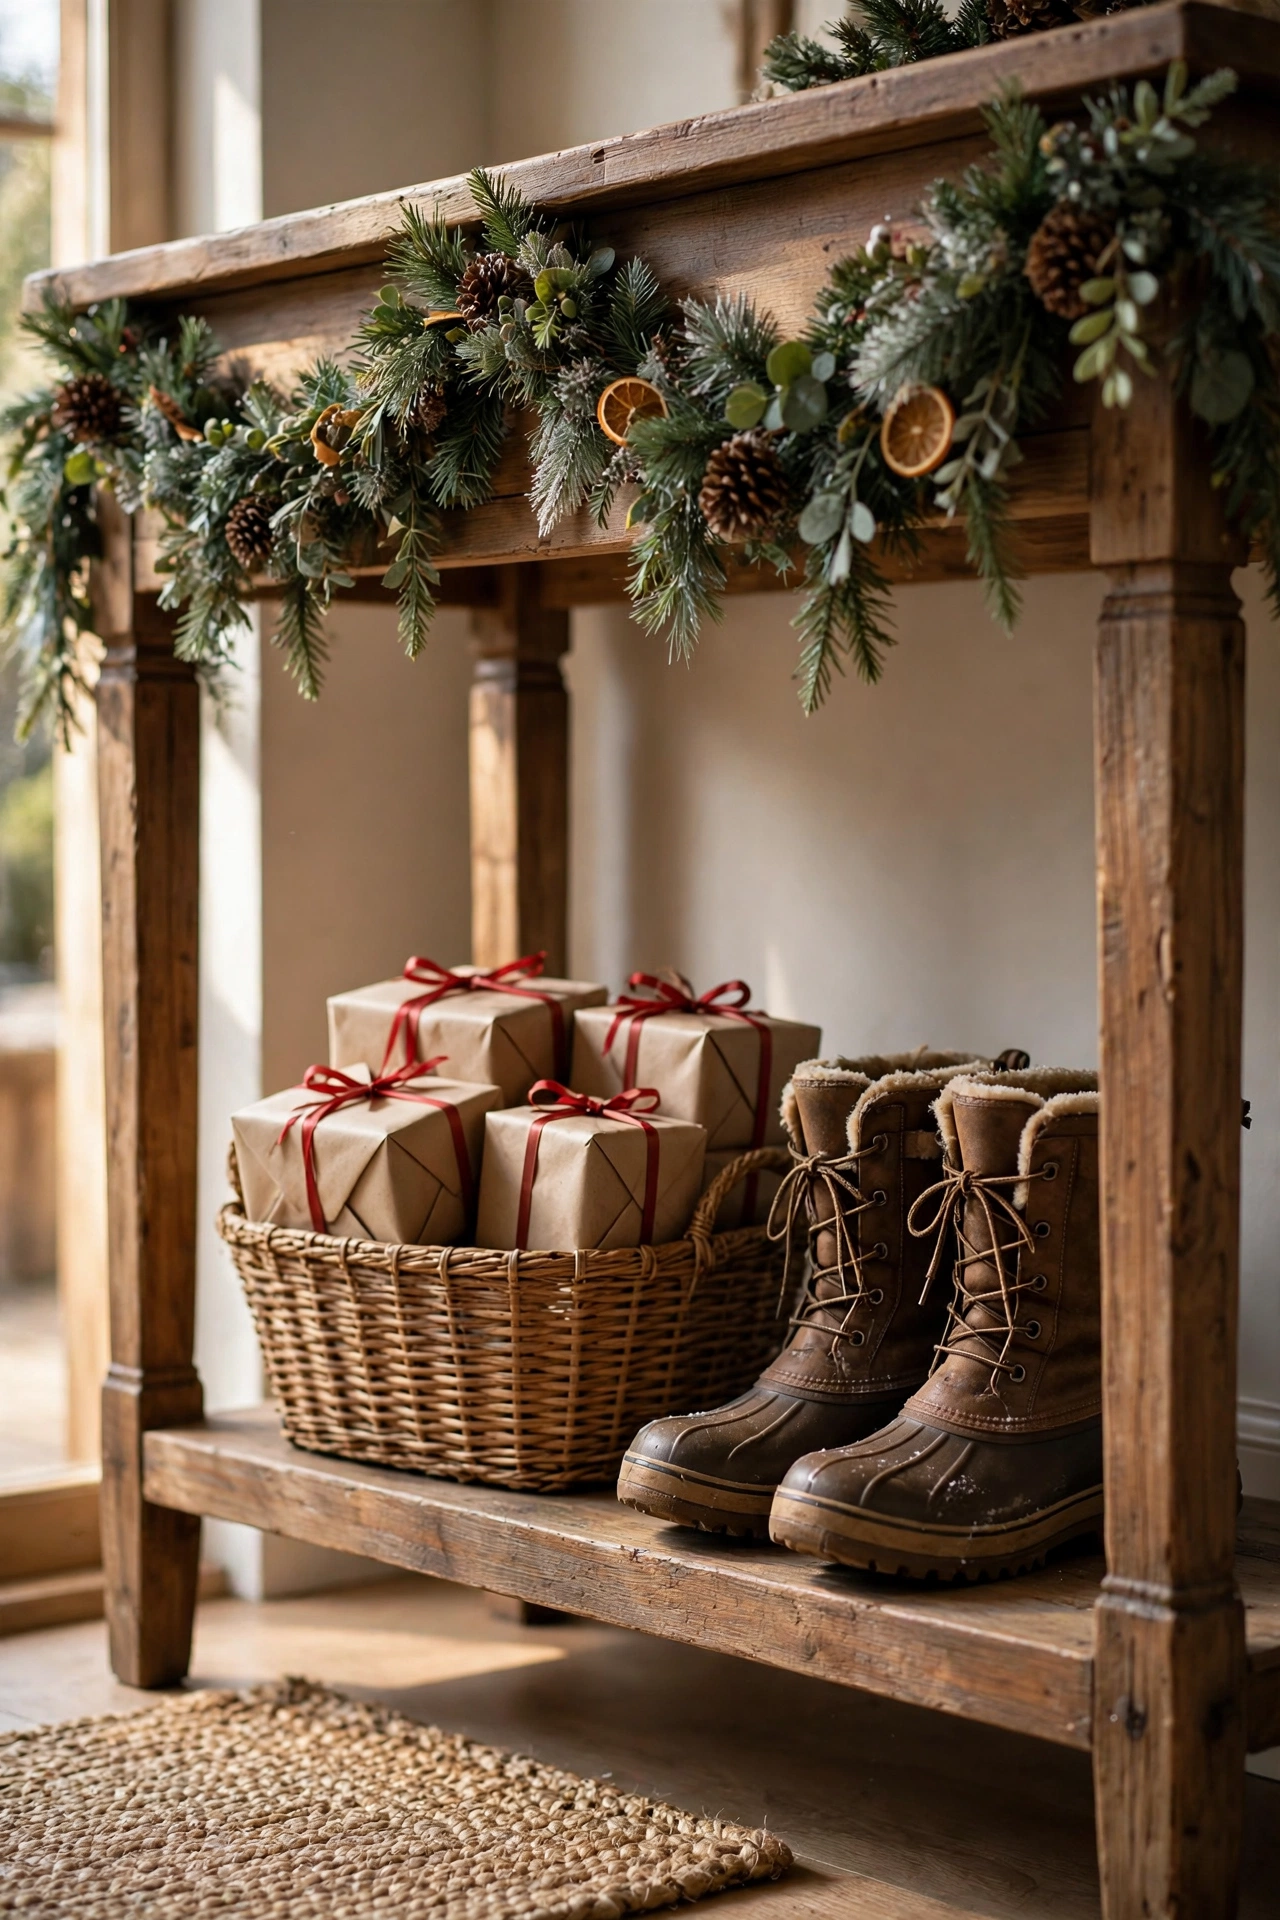
Below the table is the fifth part, and it is free space most people waste. A woven basket, a pair of wrapped gifts, a row of boots by the door, or a low crate with firewood can sit there and finish the look from the floor up. Keep it neat, keep it to one or two items, and keep the floor in front of the table clear so nobody trips. The below layer should feel like the base of the display, not like storage that spilled out. If you use gifts below, wrap them in the same paper and ribbon as the rest of your home so they look intentional.
2. Garland Along the Back Edge (and How It Spills)
The garland is the single piece that makes a console table look like Christmas, even before you add anything else. Lay it along the back edge of the table, where it meets the wall, so it frames the display instead of sitting in the middle and getting in the way. Let it run the full length of the table, with a little spill over each end if your table allows it. That spill is important. A garland that stops exactly at the edge looks cut off. A garland that drops a few inches over each end looks generous and finished, like it belongs there.
Once the garland is in place, dress it in layers. Start with lights if you use them, and choose warm white battery lights with a timer so you do not have to remember to switch them off. Tuck the battery pack behind the garland at one end, where it is hidden but still easy to reach. Then add ribbon, weaving it through the greenery in loose loops rather than tight wraps. A wide velvet ribbon in red, forest green, or cream looks soft and rich, and it catches the light in a way that thin ribbon does not. Let the ends of the ribbon hang down a little at each end of the table for movement.
The spill matters most at the ends. Let a few branches hang down over the edge, and let one longer branch drop a little lower than the rest. That uneven drop looks natural, like real greenery growing over a wall. If your garland is artificial and the ends look stiff, bend the wire tips gently, or tie a small bunch of extra sprigs to the end with floral wire and let that bunch hang. A short piece of ribbon tied where the garland spills over the edge can hide the join and add a neat finish.
Keep the garland away from anything hot, and keep it clear of the drop zone in the middle. Battery operated flameless candles only, never a real flame near dry greenery. That rule applies here more than anywhere else, because a garland is dry by nature, whether it is real or artificial, and a flame beside it is a risk you do not need. Flameless candles give you the same warm glow, they are safe to leave on a timer, and you can tuck them into the garland without worrying. If you love the look of a real candle, use it on a different surface, away from greenery, and never leave it unattended.
3. A Wreath or Mirror Above the Table
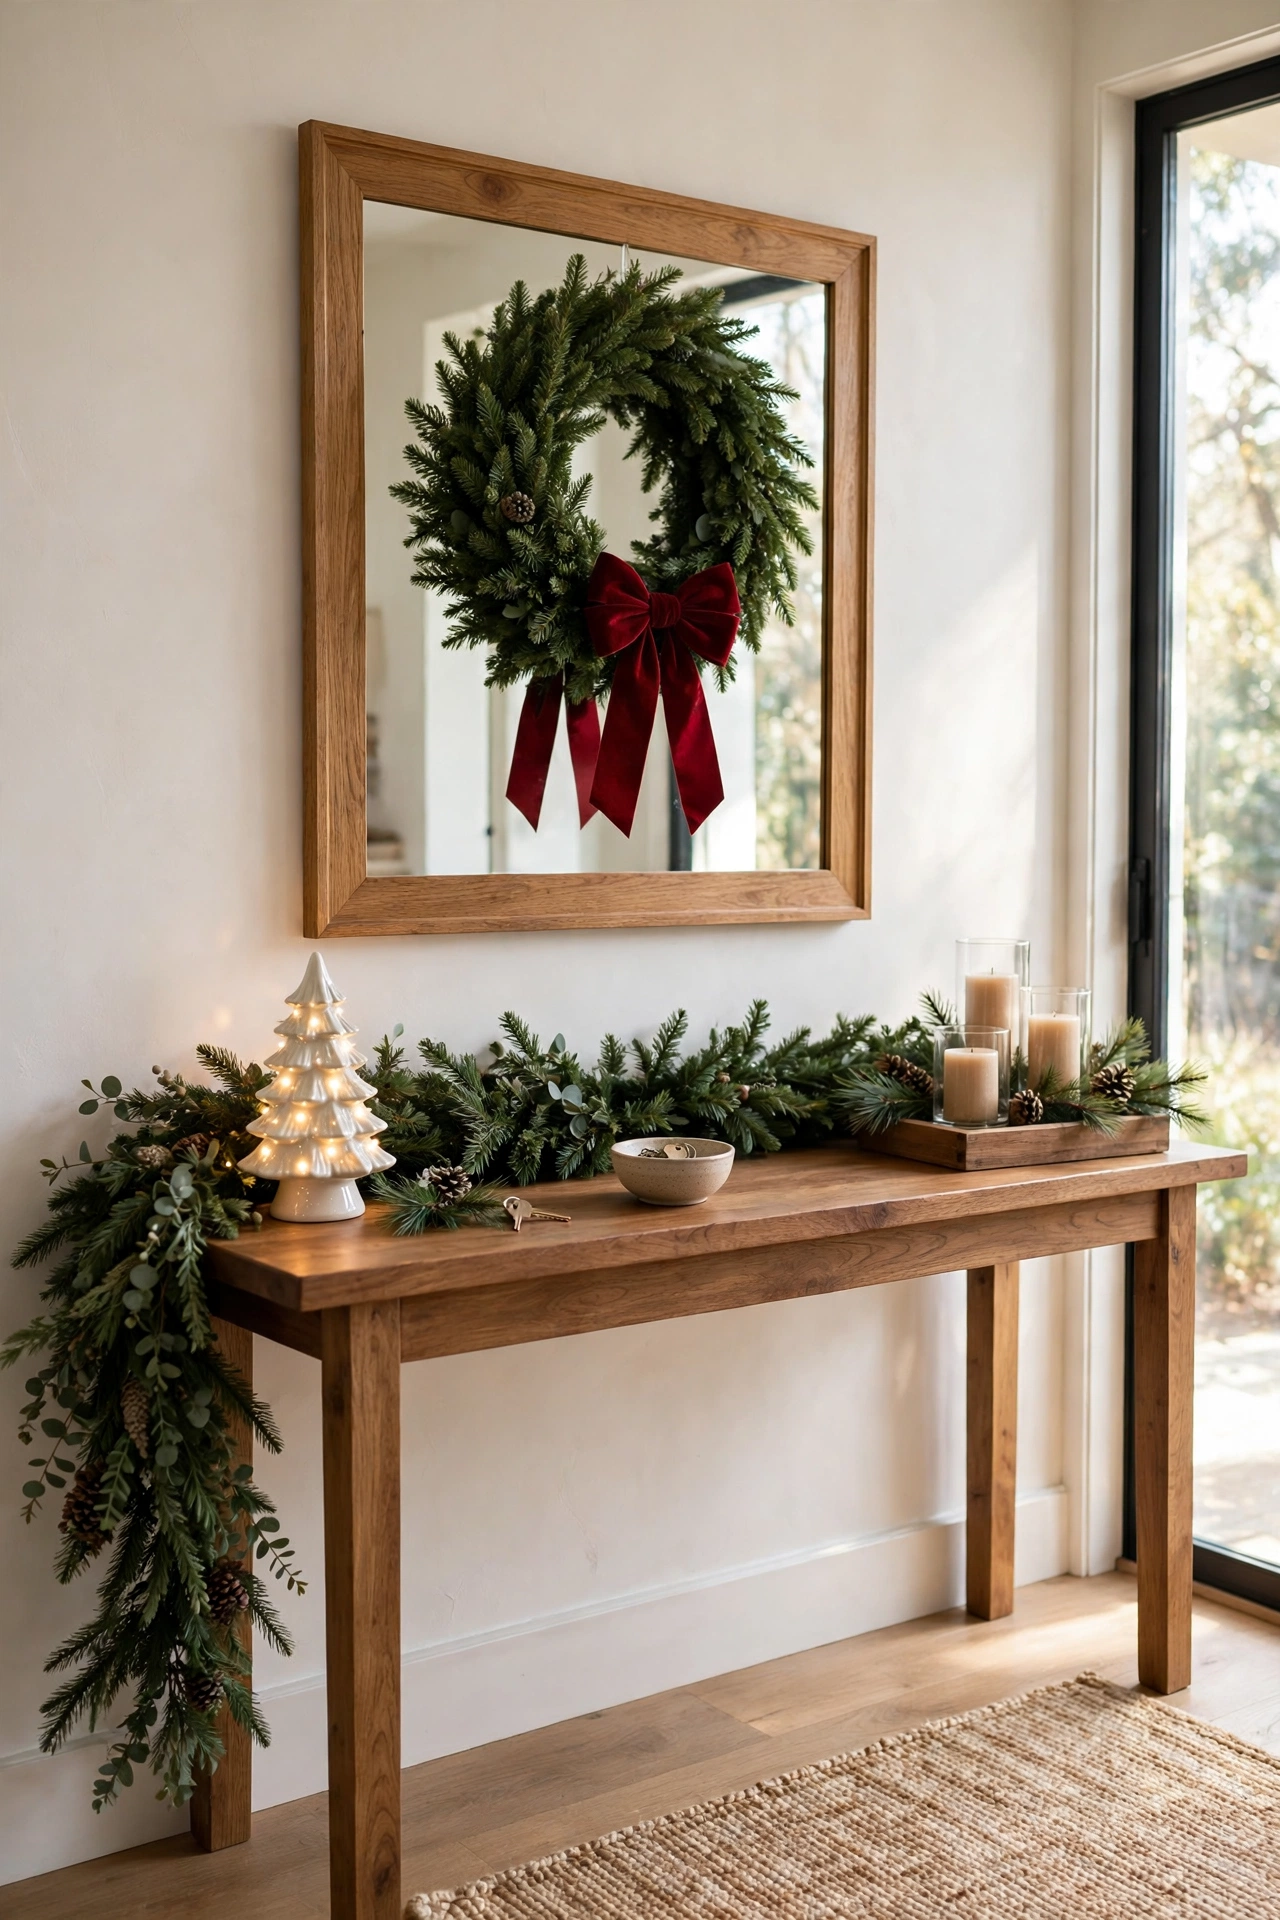
The wall above the console is half the display. A bare wall makes even the best dressed table look unfinished, while a wreath or a mirror fills that space and gives the anchor something to sit under. If you have a mirror, use it. A mirror reflects light, makes a small hallway feel larger, and gives you a place to hang a wreath without making a new hole in the wall. If you do not have a mirror, a wreath on its own works just as well, especially a full wreath with a clear shape and a good bow.
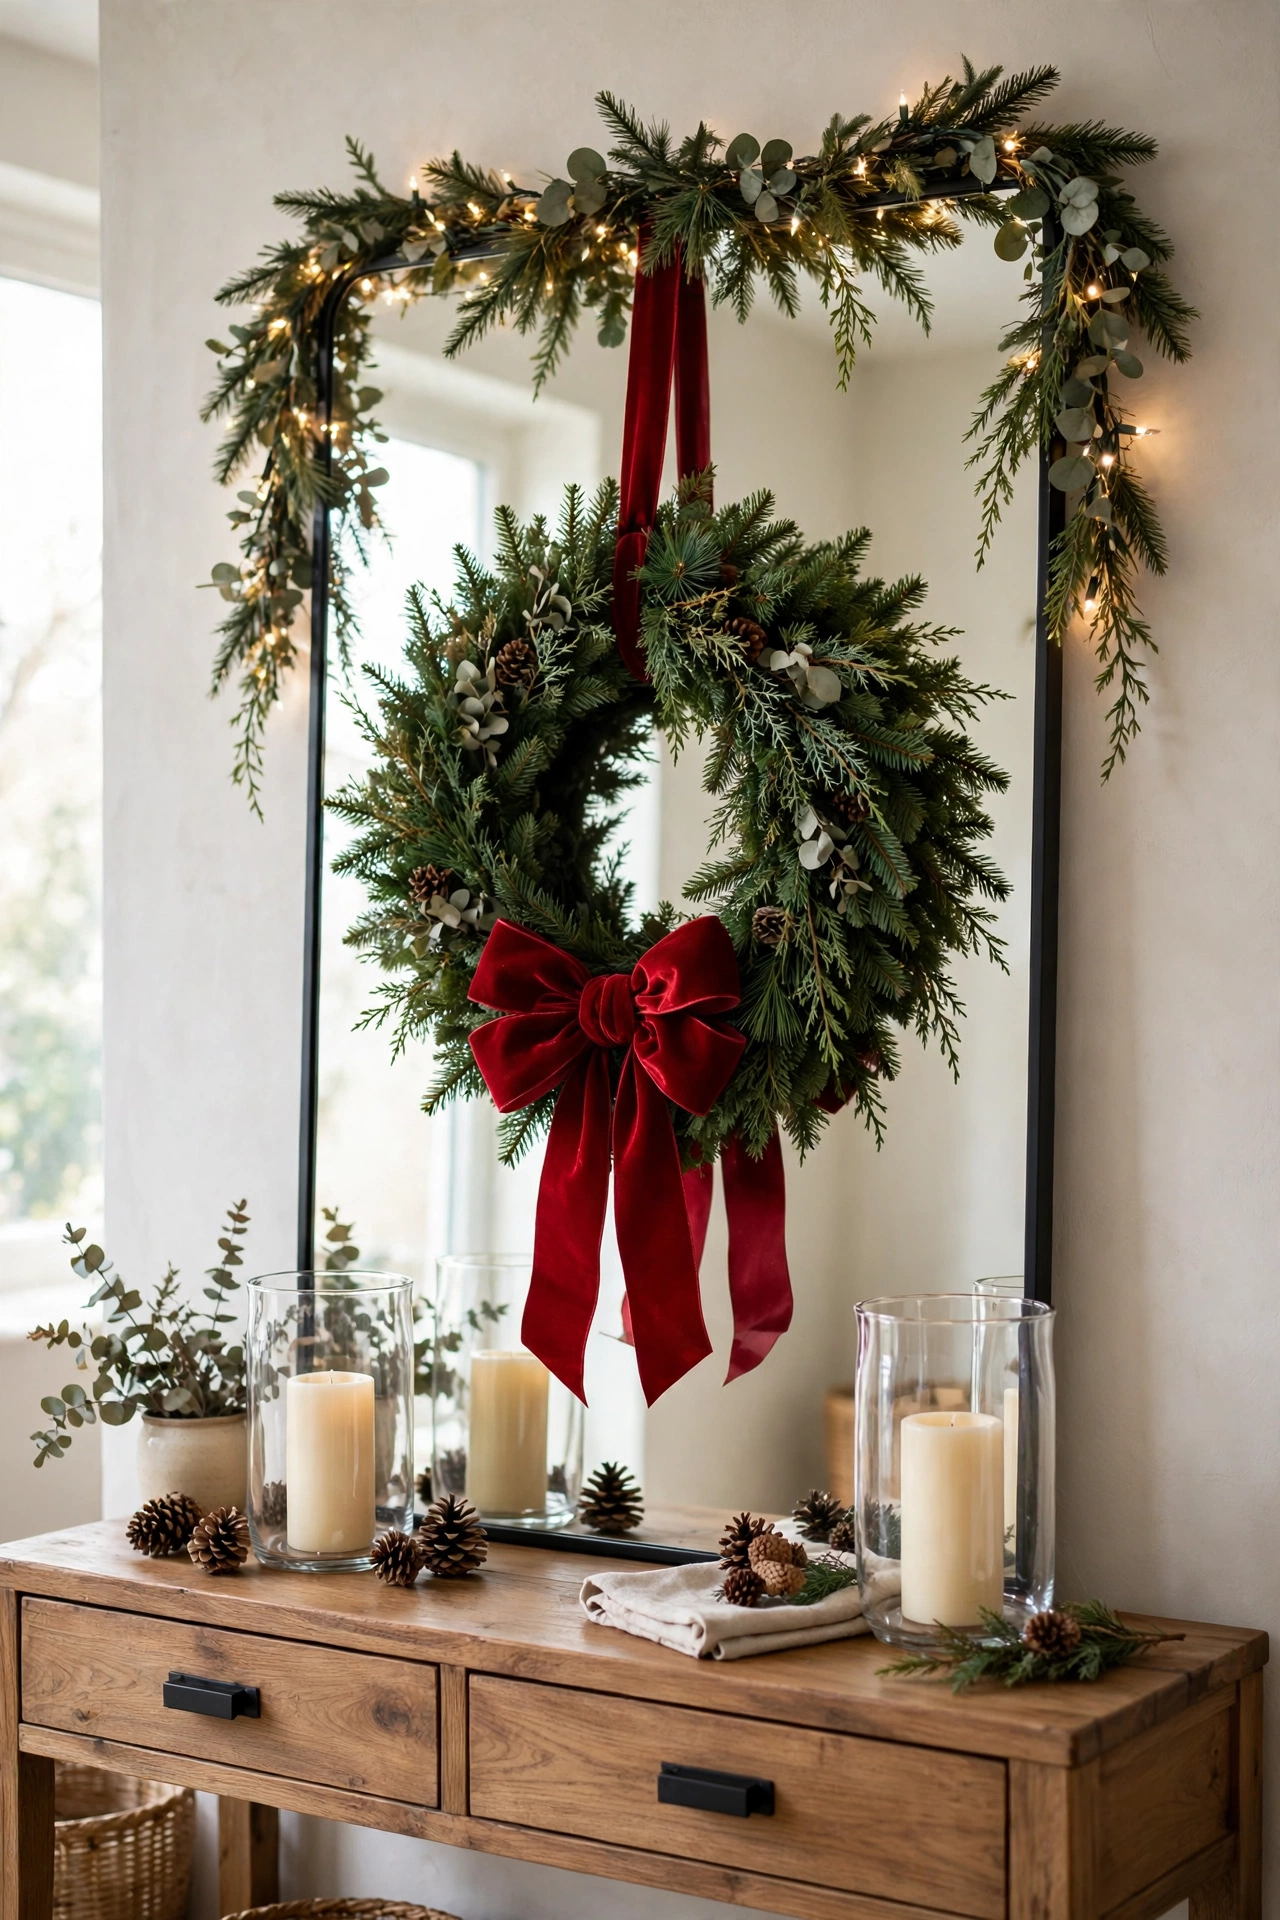
Hang the wreath on the mirror, not beside it. Centre it on the glass, a little above the middle, so the mirror still shows around the edges. Use a ribbon loop over the top of the mirror, or a suction hook made for glass, so you do not damage the frame. A red velvet bow at the top of the wreath, or at the bottom where the ribbon meets the glass, adds a soft focal point and ties the wreath to the ribbon in your garland. Keep the bow simple. One loop, two tails, and a neat knot will look better than a large fussy bow that hides the wreath.
If you hang a wreath directly on the wall, centre it over the table and leave a gap of at least a hand span between the bottom of the wreath and the top of the garland. That gap lets the two pieces breathe and stops them from merging into one green mass. If the wreath is small, add a pair of small candlesticks or a small framed print on either side to widen the display. If the wreath is large, let it stand alone and keep the table below it simpler, so the wreath stays the star.
A mirror with a wreath also helps in a dark hallway. It bounces the light from your garland lights, from a nearby lamp, or from the front door when it opens, and it makes the whole entry feel brighter. Clean the glass before you hang the wreath, because dust and fingerprints show up more once greenery is in front of it. Place unlit candles in glass holders on the table below the mirror, and you will get a double glow, once from the candle itself and once from its reflection. That is a simple trick that makes a small display feel much richer.
4. The Drop Zone: Keys, Mail and Wallet Stay Clear
A console table in an entryway is not a display shelf. It is a working surface, and at Christmas it still has to work. The drop zone is the clear space where keys, mail, a wallet, sunglasses and a phone land when someone comes in. If you cover that space with ornaments, the family will put those things somewhere else, usually on the nearest chair or on the floor, and the tidy look will last about a day. Protect the drop zone first, and decorate around it.
The easiest way to protect it is to give it a home. A small bowl, a shallow dish, or a short tray in the clear middle of the table tells everyone where keys go without a word. Choose a bowl that is wide enough for a set of keys and a phone, but not so deep that things disappear into it. Ceramic, wood, brass or glass all work, and a bowl in a Christmas colour, such as deep green or warm red, will look festive without needing any decoration of its own. Put the bowl in the clear middle, a little toward the front edge, where a hand naturally reaches.
Mail needs a different solution. A small stack of letters looks untidy after a day, and a pile of parcels will take over the table. Use a slim letter holder, a magazine file, or a simple basket below the table for mail, and clear it every evening. If you get a lot of Christmas cards, do not pile them on the console. Display a few favourites on the garland with small clips, or on a string along the wall, and keep the rest in a box until you have time to enjoy them. The console should welcome you, not remind you of admin.
A wallet, a purse and a phone need a flat, clear patch, not a bowl. Keep a space about the size of a book free beside the bowl, and do not put a candle or a bauble there, even a small one. That empty patch is the most useful part of the whole table in a busy week. If you have children, keep that patch at a height they can reach, and put anything breakable higher up or further back. A console that works for the smallest person in the house will work for everyone.
5. The Tray Vignette That Lifts Away in One Move
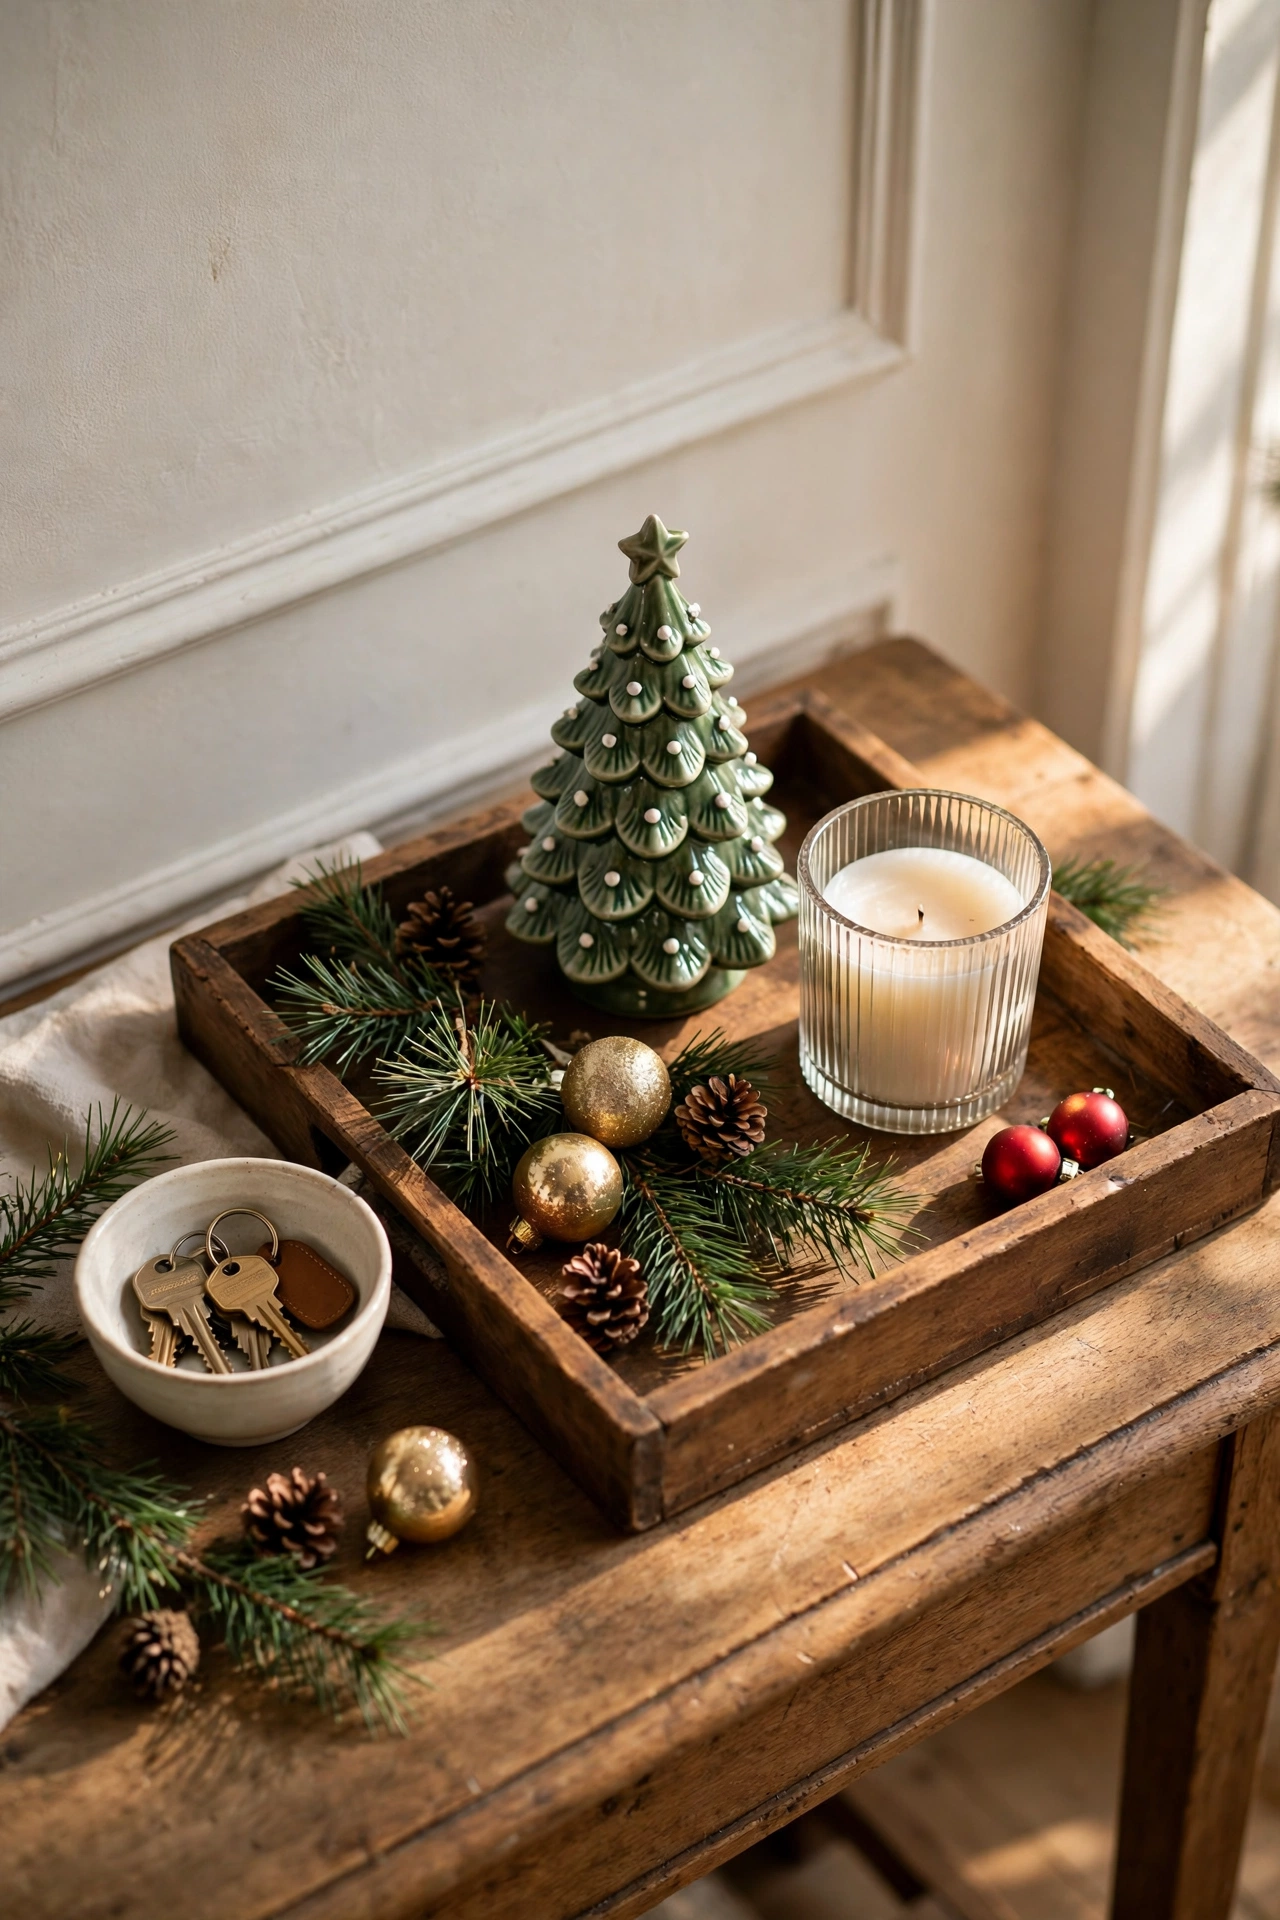
A tray is the most useful decorating tool for a console table, because it turns a group of small objects into one object. Put a wooden tray, a rattan tray, or a simple metal tray at one end of the table, arrange three or four pieces inside it, and you have a vignette that looks finished and that you can lift away in one move when you need the surface. That one move test is the difference between a display that survives December and one that gets pushed aside and never put back.
Inside the tray, build in three heights. A low height, such as a small bowl for keys or a cluster of pine sprigs, sits at the front. A medium height, such as a ceramic mini tree or a short stack of books, sits in the middle. A taller height, such as an unlit candle in a glass holder or a small vase with a branch, sits at the back. Those three heights create a little scene that the eye can read in one glance, without any one piece blocking another. Keep the tallest piece shorter than your anchor at the other end of the table, so the tray does not compete with the main focal point.
Use odd numbers and leave a little air inside the tray. Three pieces often look better than five, and five look better than seven. If the tray looks full, take one piece out and see if it looks calmer. A sprig of pine, a single bauble, or a small cinnamon bundle can fill a gap without adding another object. The tray should look like a small, complete world, not like a shelf where things were stored. If you can describe the tray in one sentence, such as a mini tree, a candle and a bowl for keys, you have the right number of pieces.
The lift away test matters most on party nights and on days when parcels arrive. When you need the table, lift the whole tray, put it on a nearby chair or on the floor beside the table, and use the surface. When the evening is over, lift it back. Because everything stays together in the tray, you do not have to remember where each small piece went, and you do not lose a bauble under a pile of coats. That is why a tray vignette lasts longer than loose ornaments scattered across a table.
6. One Mini Tree at One End
One mini tree is enough. It gives the console height, colour and a clear Christmas signal, without taking over the table. Put it at one end, not in the centre, and let the other end hold the tray or a lower group. That contrast, tall at one end and low at the other, is what makes the table feel balanced. Two mini trees, one at each end, can work on a very long table, but on most consoles one tree looks calmer and leaves more room for everything else.
Choose a tree that fits the scale of your table. A tree between 30 and 60 centimetres tall suits most consoles. Shorter than that, and it can look lost behind the garland. Taller than that, and it can block the mirror or the wreath above. If your table sits under a low shelf or a picture, measure the gap before you buy. A tree in a small pot, a basket, or a ceramic planter looks finished, while a tree in a plastic pot looks unfinished unless you cover the pot with fabric, paper, or a small basket.
Decorate the mini tree simply. A string of tiny warm lights, a handful of small baubles in one or two colours, and a simple topper, such as a small star, a bow, or a pinecone, are enough. Do not try to fit full size ornaments on a mini tree. They will overwhelm it and hide its shape. Small baubles, wooden stars, and dried orange slices suit a mini tree because they are light and they leave the green visible. Step back and check that you can still see the shape of the tree through the decorations.
Place the tree where it will not be knocked. At the end of the table, against the wall, is safest, with the garland curving around its base to join it to the rest of the display. Tuck a little extra greenery, a few pinecones, or a fold of ribbon around the base to hide the pot and to make the tree look planted in the display rather than placed on top of it. If the tree is artificial, fluff the branches gently so it looks full from the front, where guests will see it, and do not worry about the back, which faces the wall.
7. Below the Table: Baskets, Wrapped Gifts, Boots
The space below a console table is often left empty, and that empty space makes the table look like it is floating. Use it. A woven basket, a row of wrapped gifts, a pair of boots by the door, or a low crate can anchor the table to the floor and finish the display from the bottom up. The key is to keep it to one or two items, in the same colours as the table above, so it reads as part of the display rather than as storage.
A woven basket is the easiest choice. Fill it with wrapped gifts, with extra throws, with firewood, or with pinecones, and place it under one end of the table. A basket with gifts looks festive and practical, because those gifts are waiting to be given and they do not need a separate hiding place. Wrap them in the same paper you use elsewhere in the house, tie them with the same ribbon, and stack them neatly with the largest at the bottom. Do not pile gifts so high that they touch the underside of the table. Leave a small gap so the table and the gifts read as separate layers.
Boots and shoes belong by the door, not on the table, but they can sit neatly below the console if that is where your family leaves them. Use a low tray or a boot mat under the table to contain them, and keep the row to two or three pairs. A tidy row of boots under a Christmas console looks lived in and welcoming, especially in a family home. A scattered pile does not. If you have many pairs, keep only the current ones below the table and store the rest elsewhere.
Keep the floor in front of the table clear. Do not let the below layer spill out into the walkway. A basket that sticks out into the hall will be kicked, and a gift that sticks out will be tripped over. Push the below items back so their front edge lines up with the front legs of the table, or sits just behind them. That line creates a neat rectangle from the wall to the floor, and it makes the whole entry feel tidy even when the rest of the house is busy.
8. Narrow Consoles and Small Hallways
A narrow console in a small hallway can look just as festive as a wide one, and in some ways it is easier, because you have fewer choices to make. The same formula applies, anchor, middle, low, line, below, but you scale each part down and you protect the clear space even more carefully. A narrow table has no room for waste, so every piece must earn its place.
Start by measuring. A console that is less than 30 centimetres deep cannot hold a thick garland and a tray and a tree at the same time. Choose one: a slim garland along the back edge, or a tray vignette, not both at full size. A slim garland, made from a single strand with small lights and a few sprigs, will give you the Christmas line without taking up the whole depth. A small tray, placed at one end, can hold the mini tree and the candle together in one compact group. That is often the best solution for a narrow table: one compact group at one end, a clear middle, and a slim line along the back.
Light matters more in a small hallway than in a large room. A narrow hall is often dark, especially in winter, so warm lights in the garland, a flameless candle in a glass holder, and a mirror to reflect them will make the space feel welcoming rather than cramped. Use battery lights with a timer, and keep the battery pack hidden behind the garland. Avoid a real flame in a narrow hallway, where coats and scarves hang close to the table and where people pass within inches of the display. Battery operated flameless candles only, never a real flame near dry greenery, and never a real flame where a coat could brush against it.
Finally, protect the walkway. A console in a small hallway must not narrow the path. Measure the clear floor space after you decorate, and make sure there is enough room for someone carrying a bag to pass without turning sideways. Push the below basket fully under the table, keep the garland from spilling too far over the front edge, and do not hang anything low over the table that someone could bump with their head. A small hallway that is easy to walk through feels more welcoming than a hallway that is beautifully decorated but hard to use.
Conclusion
A Christmas console table does not need to be perfect, and it does not need to be expensive. It needs to be welcoming, useful and calm. Start with the formula, anchor, middle, low, line, below, and build one layer at a time. Lay the garland along the back edge and let it spill a little at the ends. Hang a wreath or a mirror above it to fill the wall. Protect a clear drop zone for keys, mail and wallet, and give keys a bowl so everyone knows where they go. Build a tray vignette you can lift away in one move. Add one mini tree at one end for height and colour. Use the space below the table for a basket or a row of wrapped gifts. Adapt everything for a narrow console by going slimmer, taller and simpler.
Step back when you finish, take a photo, and look at the small image. If the middle is clear, if the heights are balanced, and if one colour repeats gently through the display, you have done it. Leave the table alone for a day and see how it works. If keys land in the bowl, if mail does not pile up, and if nobody knocks anything over, the display is working. If something keeps getting moved, move it yourself to a better spot, or take it away. A console that works for your family is better than a console that looks good in a photo for five minutes.
Frequently Asked Questions
How do I decorate a console table for Christmas without making it look cluttered?
Start with the anchor, middle, low, line, below formula and leave at least a third of the top clear in the middle. Choose one tall anchor, one low tray group, and a slim garland along the back edge. Add pieces in small clusters, step back after each layer, and remove one thing before you add the next if the table starts to look busy. A photo on your phone will show clutter faster than looking at the real table.
What should I put on a Christmas console table in an entryway?
Put a garland along the back edge, a wreath or mirror above, one mini tree at one end, a tray vignette at the other end, and a small bowl in the clear middle for keys. Add flameless candles for light, pinecones or baubles for texture, and a basket or wrapped gifts below the table. Keep a clear patch for wallet, phone and mail, so the table stays useful as well as beautiful.
How do I keep the middle of my console table clear at Christmas?
Give keys a bowl, give mail a holder or a basket below, and keep a flat patch about the size of a book free beside the bowl. Tell your family once where each thing goes, and put your own keys in the bowl every time. If the table is narrow, keep decoration to the ends and the back edge only, and let the whole middle stay empty. A clear middle is what makes the display look calm.
Can I use real candles on a Christmas console table?
Use battery operated flameless candles only, never a real flame near dry greenery. A garland, a wreath and a mini tree all dry out indoors, and a flame beside them is a risk you do not need. Flameless candles give the same warm glow, they work on a timer, and you can tuck them safely into greenery. If you love real candles, use them on a clear surface away from greenery, and never leave them unattended.
What is the best garland for a narrow console table?
Choose a slim garland, or layer two thin strands together so you can shape it without adding bulk. Lay it along the back edge, let it spill a little over each end, and add lights, ribbon and a few small clusters of pinecones or baubles. Avoid a very thick garland on a narrow table, because it will take up the whole depth and hide the wall. A slim garland with a little texture looks full without crowding the surface.
How do I style the space below my console table at Christmas?
Place one woven basket under one end, filled with wrapped gifts, throws, or firewood, and keep it pushed back so it does not stick out into the walkway. Wrap gifts in the same paper and ribbon as the rest of your home, stack the largest at the bottom, and leave a small gap below the tabletop. Keep boots in a neat row on a low tray if they live there, and keep the floor in front of the table clear so nobody trips.
Budget Table
| Item | Approximate cost |
|---|---|
| Slim artificial garland, 180 cm | 15 to 25 dollars |
| Small wreath for mirror or wall | 12 to 20 dollars |
| Battery flameless candles, set of 3 | 10 to 18 dollars |
| Wooden tray for vignette | 10 to 20 dollars |
| Mini tree, 45 cm, with pot | 12 to 22 dollars |
| Warm white battery fairy lights | 6 to 12 dollars |
| Velvet ribbon, 3 metres | 5 to 9 dollars |
| Small ceramic bowl for keys | 6 to 12 dollars |
| Woven basket for below the table | 12 to 20 dollars |
| Pinecones, baubles and sprigs | 8 to 15 dollars |